 LIMITED SPOTS
All plans are 30% OFF for the first month! with the code WELCOME303
LIMITED SPOTS
All plans are 30% OFF for the first month! with the code WELCOME303

LIMITED SPOTS
All plans are 30% OFF for the first month! with the code WELCOME303

Thunderbird is one of Mozilla's most popular open source projects, but it can be confusing for beginners. In this guide we'll explain everything you need to know about adding multiple email addresses to your account so that you can send messages on behalf of other people without having them sent directly to their inboxes. We've also covered some advanced features such as creating groups within your organization using Thunderbird.
If you have any questions or suggestions after reading this guide please let us know by leaving feedback below.
Note: This guide uses Thunderbird 3.1.3. If you're running version 2.0.4 (or later) then there are some slight differences, but the basic process should remain similar.
To start setting up an email group with Thunderbird go to Tools " Accounts. You will see options to create both local mailboxes and IMAP mailboxes. Local mailboxes store all incoming emails on your computer while the IMAP mailbox stores all those emails online at your domain name. For our purposes here though, we only care about the first option -Local Mail Box- which creates two sections under that box titled General Settings and Address Book. We want these boxes because they contain settings specific to each section.
Under general settings click Add Account... and enter your user information including username, password, server, port number, SSL/TLS encryption and SMTP authentication. If your system has already been set up to use Thunderbird for sending out outgoing e-mails then skip over this step. Otherwise follow the instructions outlined on screen.
Next select Internet Email from the Type dropdown menu and check off Use Simple Authentication Dial-In User Service (SENDER ID). Then fill out the fields labeled Name, Sender Identifier, Reply To and From where you can type in whatever you'd like the sender name to appear as when replying to someone. The best way to make sure what you entered looks good is to copy and paste what appears in the Send E-Mail window before hitting OK.
Now hit Create Account and wait for Thunderbird to finish importing the details for your new account. Once complete you'll find yourself looking something like this:
You now have two separate areas in Thunderbird called My Personal Folder and Sent Items. Under My personal folder you'll find folders for every single person you added to Thunderbird earlier. Double click on the appropriate folder for the individual account you just created, i.e. if you clicked John Doe above then double click his folder. Inside you should see your default New Message window, plus additional tabs for Calendar events, Contacts info, Notes etc. That's all folks! Now you can get down to business managing message flow through Thunderbird.
The easiest way to manage large amounts of email traffic is to set up rules for certain types of incoming messages. Let's say you work for company X. Your job requires you to receive and respond to emails related to said company. But instead of doing things manually you could setup a rule in Thunderbird that automatically forwards incoming emails from anyone matching a particular criteria to a special Thunderbird label. Here's how it works.
First navigate inside your Thunderbird profile directory located at /.thunderbird/. Open up thunderbird.defaults file and search for the following line:
mail.rules.* = tbimailreceiver@domainnamehere
Replace @domainnamehere with wherever you registered your new email address with your provider. Next scroll down until you come across the following lines:
mail.ruleSetName = Rules Set 1
mail.rulesetID = 0x7f9a6d8c2ea95
Change RuleSetID to match the value found next to rulesetID in your thunderbird.defaults file. Change the Value field to point to either 1 or 2 depending on whether you want to forward messages to labels A or B respectively. Finally change tbimailreceiver@domain to whichever email address you used during registration. Hit Ctrl+X followed by Y to save changes.
Once saved restart Thunderbird. Go ahead and test your newly configured forwarding rules out by clicking on Labels->A and entering text in the Subject header area. When finished, close Thunderbird. Restart again and repeat steps 4 & 5 for Label B. Note that even though you may not currently have anything showing up in Thunderbird, the rules were successfully applied. Also remember that you can assign different rules per person based upon who the actual sender was. Just keep track of what rules you assigned to whom throughout the day.
When you log back in run through the same procedure described above starting from Step #5 and changing the values associated with RuleSetId and Value accordingly. It's important that you don't forget to update the rules once your email usage grows substantially larger than what you had originally planned.

Adding another email address isn't too difficult. First you must modify your thunderbird.defaults file located at /.thunderbird/. Search for the following line:
mail.server.local=smtp://username:password@some_ip_address
Notice how it says smtp:// rather than imap://. That means you aren't connecting to the internet through your existing email provider. Instead you're going to tell Thunderbird to connect via its own internal network. Replace smtp:// with imap:// and replace @some_ip_address with your external IP address. Save changes and restart Thunderbird. Log back in and try logging in with your new credentials. Hopefully Thunderbird will accept the login attempt.
If not, you might notice a few problems popping up. One possible cause would be incorrect DNS configuration. Another common issue is bad syntax in your email provider's security certificate. Most providers have a button somewhere near the bottom left corner of their web pages that lets users download a certificate onto their computers. Clicking that link usually brings up a pop-up asking you to install a Certificate Authority (CA) extension. Make sure to correctly designate a root CA trust authority named ThwateCertificateAuthority. Select Continue Anyway and proceed through the wizard. Once done you should be able to access Thunderbird normally.
If you still encounter errors then chances are your email provider blocked connections coming from Thunderbird because of suspicious activity. Try contacting customer service and ask them to unblock Thunderbird. If all else fails contact tech support directly and explain the situation. They might be able to help you troubleshoot the problem. Either way hopefully you won't have to reach this far. And remember, you can apply the same methods outlined above to set up more than one email account.
That covers pretty much everything you'll ever need to know about organizing, filtering and archiving emails within Thunderbird. Of course there's plenty more to learn about configuring Thunderbird, so feel free to leave comments if you spot any mistakes or want to share your tips. Until next time happy browsing!
Thunderbird is an all-in-one desktop email, calendar, task manager, RSS reader, browser, photo viewer, music player—and it's free! But what if you want to use more than one account with your Email program? Here's how to manage multiple eMail accounts in Thunderbird.
If you're new to Thunderbird or just need some help setting things up for the first time, don't worry. This guide will teach you everything you need to know about adding additional mailboxes to Thunderbird.
The steps are fairly straightforward but may vary slightly depending upon which version of Thunderbird you're using (e.g., 3.1 vs. 4) so be sure to check out our detailed instructions below.
In order to maintain compatibility between different versions of Thunderbird, we'll focus here on version 5.0. However, the following tips should also work with earlier versions such as 3.1.4 and 3.2.x.
You can create unlimited number of email aliases within each individual Mail Account profile that you've created in Thunderbird. Each alias essentially refers to another mailbox within Thunderbird itself. You can even have two identical profiles operating at once, both pointing to separate mail servers that reside outside Thunderbird. The only restriction is that you cannot have more than three active aliases per user name. If you exceed this limit then Thunderbird won't allow you to send messages from any of these extra aliases. It might sound weird but there actually isn't much difference between having one and several aliases anyway. When you click "Send Message" in Thunderbird, the message gets sent directly to whichever alias happens to match the username you used when creating that particular Mail Profile. Therefore, whenever you receive incoming messages, they get filed away under appropriate folders based solely on their sender's username. So regardless of whether you have 10 aliases or 100 aliases, every single person who sends you an email will always end up falling into their own unique folder structure. In other words, your inboxes never look cluttered because there's no way for them to intermingle.
So now let's assume that you've got five email accounts to keep track of. How would you go about configuring those accounts so that Thunderbird allows you to access them separately without cluttering up your main Thunderbird inbox?
First off, log into your primary Gmail account and head over to https://mail.google.com/settings/accounts#add_email_address. Click Create New Address underneath your existing email address. Enter a descriptive label like First Name + Last Initial followed by @gmail. Then choose Next. Now repeat exactly the same process for each of the remaining four email accounts. For example, if you had five Yahoo email accounts, you'd select Add Another Google Account instead of Create New Address. Make sure to give each account its own distinct name and follow through the wizard until completion. Once done, you should see something similar to this:
As you can see above, I added five different email aliases for my various Yahoo mailboxes. All of them point back to the same Thunderbird installation running on localhost. There are plenty of ways to connect Thunderbird to remote IMAP email services including Postbox Express [Broken URL Removed], SquirrelMail [No Longer Available] and Roundcube [No Longer Available]. We recommend choosing either Postbox Express or SquirrelMail since they provide better integration with Thunderbird's native features.
Once you've added all of your email aliases to Thunderbird, it's time to start assigning them to specific email clients. To accomplish this goal, simply open up Thunderbird and navigate to Tools - Options... Choose Accounts.... Select Login Information. Underneath Manage Multiple Identities (aliases), make note of all of your newly added email addresses. They should appear next to User ID, Display Name, Nickname, Reply-To and Primary SMTP Server fields. Also ensure that Auto Compose Messages contains the correct information for each respective email alias. Finally, scroll down to the bottom section called Other Settings where you'll find options related to sending emails via POP3, Send Mail As Features, Disable Sending Spam Report, Enable Sender Policy Framework and finally Default Folder. Below each field, enter your preferred default Thunderbird location for receiving attachments, downloading pictures, etc.
Now that you've configured Thunderbird to recognize all of your email aliases, you can assign them accordingly within Thunderbird settings menus. Open thunderbird.cfg file located inside %USERPROFILE%\AppData\Roaming\mozilla-thunderbird on Windows XP systems and /home/"user"/.config/Thundersbird on Linux and Mac OS X machines. Locate the line starting with #Aliases= and append the desired Aliases after the = symbol. Save changes and restart Thunderbird. That's it! Your Thunderbird setup should now contain all necessary configuration files required to utilize your new email aliases.
Here's how my Thunderbird looks after being customized according to the procedure outlined above:
For quick reference purposes, let me remind you again that Thunderbird stores your contact data exclusively within its internal database rather than within the actual application executable. Since Thunderbird does not offer built-in functionality for importing.csv or.vcf format vCard contacts, users must import contacts manually using standard Outlook CSV (.csv) or VCF (.vcf) files.
By default, Thunderbird places imported names right alongside their associated phone numbers. Although this approach works fine most of the times, sometimes you'll encounter problems due to duplicate entries. Most often this occurs when someone has changed their mobile phone provider yet neglected to update their vCard info. Alternatively, maybe you've moved house recently and want Thunderbird to automatically synchronize names across your various devices. In addition, there's also the possibility that someone else could gain unauthorized access to your computer while you leave them unattended. Whatever the reason, please refer to official Mozilla documentation detailing how to properly merge external contacts with Thunderbird.
That said, assuming you've successfully synchronized your Thunderbird contacts with the latest version of Microsoft Outlook (or whatever third party tool you prefer), you can proceed ahead and move onto step 2.
Open up Thunderbird and browse to Help - Troubleshooting Guide. Scroll down to the very last tip titled Merge Contacts. After clicking View details link next to that, locate the heading labeled Importing External Data. Click on Show Advanced Installations Menu item. Checkmark the box beside Run Thunderbird Setup Wizard and hit OK button. Follow the subsequent prompts until you reach the final screen asking you to Merge Contacts. Hit Finish. Thunderbird will take care of merging your external contacts with its own ones. Rest assured knowing that your personal information remains safe and secure. Finally, close Thunderbird before proceeding further.
After completing all of the aforementioned tasks, your Thunderbird should resemble something along these lines:
Assuming you've managed to set up all of your email accounts correctly, you'll notice that Thunderbird doesn't clutter up your main Thunderbird inbox anymore. Instead, you can view messages pertaining to each particular email account independently. And best thing is that each of your individual addresses still function as normal and behave exactly the same way as they did prior to getting assigned to Thunderbird.
Have you ever tried setting up multiple email accounts in Thunderbird? What was your experience like? Do you think Thunderbird suits your needs well enough? Share your thoughts with us in comments below.
Thunderbird is an open source email application that's available for Windows, Mac OS X, Linux, Android, iOS, ChromeOS, Firefox OS, and other platforms. It provides users with access to their personal or work inboxes, as well as several useful features such as message filters, spell checking, and auto-complete functions when composing messages.
The software supports POP3 (Post Office Protocol Version 3) mailboxes and IMAP4 (Internet Message Access Protocol version 4), which are two of the most popular protocols used by email providers today. However, it does not provide any official functionality to manage Gmail accounts—instead relying on third party extensions. This means that if your provider uses either one of these services, they will need to be configured separately within Thunderbird. To help new users get started setting up their own mail server, we've compiled this guide explaining what you need to know about adding additional email accounts to Thunderbird.
Note: If you're looking for information about using Google Mail with Thunderbird, see our dedicated guide here.
To use multiple email accounts with Thunderbird, all you'll need to do is set them up individually inside the app. We recommend starting off with a simple setup where each account only sends/receives messages from itself. You should then move onto configuring Thunderbird so that both of your accounts receive emails sent to either one of them.
If you want to keep things quick and easy while still maintaining control over who sees certain private data, consider creating a shared mailing list through Yahoo! Groups. Then, send yourself a link via your preferred method (email, SMS, etc.) and invite others to sign up. Alternatively, you could also create separate "mailing lists" under different labels within Thunderbird. For example, you might have a label called Work Emails and another called Personal Messages. All incoming emails would go into those respective folders instead of landing in your main Inbox folder.
Once you've added your first account, follow the steps below to proceed to creating your next one.
1. Open Thunderbird. Click File & Account Settings at the top right corner of the screen.
2. Select Email Accounts. Look for Other Email Options near the bottom of the window and click Add Another Email Account... underneath it.
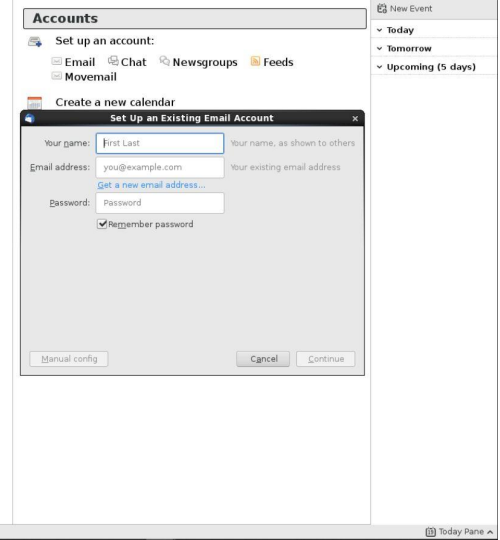
Enter your name and primary email address associated with your newly created account. Make sure that you type in your full legal name and don't forget to include your domain suffix (.com,.edu,.org). By default, Thunderbird wants you to select Advanced Setup but stick with Simple Setup unless you have specific reasons for doing otherwise. Once done, hit OK.
You may now close Thunderbird without saving changes. The following settings will take effect once the program restarts.
3. Log back into Thunderbird. Go to Menu & Help & About Thunderbird. Check out How Do I Change My Thunderbird Username? if needed.
4. Navigate to Tools & Preferences. Expand the tab labeled Network. Scroll down until you find the option labelled Default Account. Double check that SMTP Host Name has been populated correctly, replacing xxxxxxxx@gmail.com with whatever your actual hostname is. Also make sure that Port Number is correct. Leave everything else unchecked except for TLS Security Support. Hit Save Changes.
5. Now log into your newly created account and test whether Thunderbird works properly with it. Visit https://www.google.com/settings/accounts#discover_other_accounts to verify its existence.
6. When you think you've got it working, head back to Thunderbird's Account Settings and look for Send E-Mail From Address(es)... beneath Other E-Mail Options. Toggle the switch beside Always Use This Address to ON. Underneath the box that follows, mark Choose Folder Where New Envelope Will Be Created. Instead of selecting Create Separate Threads, choose No thanks. Finally, uncheck Enable Content Filtering. Hit OK.
7. Close Thunderbird again. Restart Thunderbird. Test whether sending e-mails from your secondary account worked properly. See if it shows up in the same place as your primary mailbox. If it doesn't, repeat the process above for your secondary account.
8. Repeat step 6 until Thunderbird successfully connects to all your desired accounts. At this point, you should delete Step 7 since it isn't necessary anymore.
9. Next, try sending an email directly from Thunderbird. Head to Menu & Help & Troubleshooting Info & View Technical Stuff. Find the section titled Sending An Attachment And Getting A Reply With Your Primary Email Account. Here, scroll down until you spot the button marked Show More Tips. Click it. On the popup window that appears, locate the text field named Additional Server Information. Enter in smtp:[your secondary email address]@[domain]. Replace [your secondary email address] with your actual email address and replace [domain] with the address provided by your service provider. You can leave everything else blank except for Port number, which must remain 587. Hit Continue.
10. After logging into Thunderbird, compose a new message. Type something like "Test 1", then press Ctrl + Shift + T. Thunderbird will automatically fill in the recipient's email address based on your current profile configuration. Feel free to change it if you wish. Once finished, hit Send.
11. Upon opening Thunderbird's message preview pane, you should notice that there was no error reported during transmission. Confirm that the attached file actually arrived by heading to Menu & Edit & Preview Files.
12. Lastly, double check that Thunderbird is indeed running on port 25. Launch Task Manager (Ctrl+Shift+Esc) and review the Processes tab. Ensure that thunderbird-bin matches the description of Thunderbird. If it does, restart Thunderbird.
13. Try to send a new test email. Does it arrive in Thunderbird's inbox? Did it come from the intended user? What happens if you reply to an email sent from your secondary account? Is Thunderbird able to forward the message to your primary account? Hopefully, by this stage, you won't encounter any errors. Congratulations! Now you just need to enable some extra security measures before moving onto configuring your Gmail accounts.
In theory, yes. But it depends on what kind of mail servers your chosen provider utilizes. Some popular ones include Postfix, Courier, Microsoft Exchange, and Zimbra. Unfortunately, Thunderbird simply cannot connect to all of them due to technical limitations. That said, it's worth mentioning that Outlook 2010 and later versions were capable of connecting to non-POP3 mail clients. Users had to download special plugins for this purpose, however. As far as I'm aware, Thunderbird hasn't received similar treatment yet. Luckily, though, there are plenty of great alternatives to Thunderbird that offer better compatibility across various types of mail servers.
Assuming you've followed the instructions outlined above, you can theoretically have as many email accounts as you'd like. There's just one catch: Each account needs to be assigned a unique local path where Thunderbird stores archived copies of every single outgoing message. Therefore, you should avoid having too many active aliases. Ideally, you'd like to limit your total number of active aliases to three.
For instance, let's say you have four aliases set up: johnsmith1@hotmail.com, johndoe1@yahoo.com, jonathanharry99@outlook.com, and joannemcdonald95@gmail.com. They're all linked to the same Hotmail account because you haven't changed anything after initial setup. If you ever decide to disable hotmail.live.com, Thunderbird will stop functioning properly. Similarly, if you suddenly start receiving emails addressed to jonathanharry99@outlook.com, Thunderbird will refuse to accept them. It makes sense, therefore, to split your aliases among several mailboxes. So long as none of them share the same alias, Thunderbird should continue functioning normally.
After adding your first email account, Thunderbird allows you to quickly copy entire conversations between sender and receiver by pressing Ctrl + C on highlighted emails. Doing so creates a duplicate entry for each conversation. Fortunately, you can easily remove duplicates by clicking the arrowhead icon located next to the copied email. Right-click on the selected item and choose Move Selected Items.... Then, navigate to Thunderbird's Thunderfolder location (typically Documents\\Thunderbirds\\Local Folders\\Messages) and rename the sub-directory according to the alias' name. You can even opt to group related conversations together by dragging them around.
As mentioned earlier, Thunderbird offers limited functionality to deal with multi-aliases. Even if you've managed to configure it to load a particular account per message, Thunderbird will always display all your active aliases regardless of whether they contain recipients or not. That's why you shouldn't rely on Thunderbird alone to filter spam. Instead, you should integrate anti-virus applications with Thunderbird.
 Send emails at scale

