 LIMITED SPOTS
All plans are 30% OFF for the first month! with the code WELCOME303
LIMITED SPOTS
All plans are 30% OFF for the first month! with the code WELCOME303

LIMITED SPOTS
All plans are 30% OFF for the first month! with the code WELCOME303

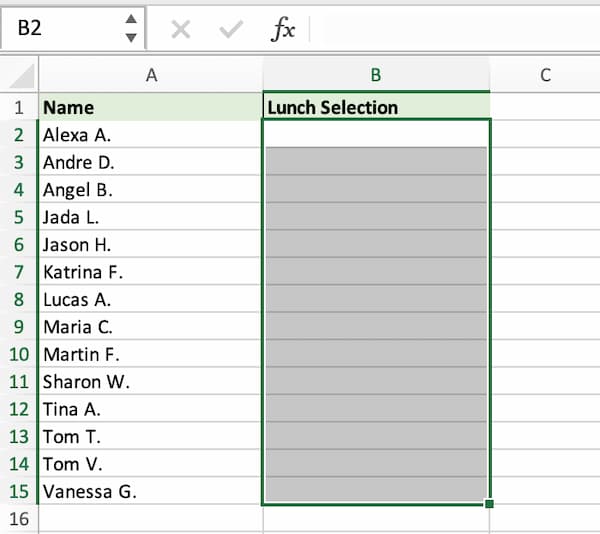
A lot of people like to collect information about various topics by sending out emails or letters asking for responses. If you have a large number of recipients who receive your emails regularly, it's easier to keep track of them all using a spreadsheet rather than having to remember their names individually every time you write up a new message. You could also use this technique when giving presentations at work, inviting guests to events, or even responding to survey questions.
The nice thing is that once you've collected your recipient data into one place (in a single Excel file), you don't need any special software or knowledge to get started -- just open up a word processing program such as Word or Outlook Express, type some text, select part or all of your data from within Excel, and export it with a simple command. This article will show you how easy it is to combine Excel spreadsheets and Word documents so that you can quickly generate personalized mailing lists and bulk emails.
Let's start off with creating a mass email from Excel. We'll be using Outlook 2010 here because many other versions of Windows let you easily add contacts to existing groups.
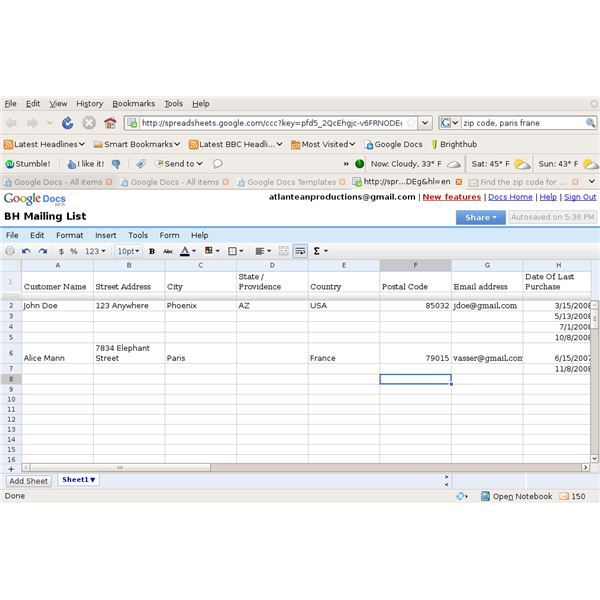
To begin, go ahead and download the sample files included in the ZIP archive linked below. These include two different types of Excel files -- one called "Mailing List" (.xls) which we are going to import into Word, and another called "Group Email" (.csv) which will allow us to use our Excel-Word combination to send mass emails later on. Once they're downloaded, extract both folders inside the zip archive to your computer desktop. Then drag these files onto the top of either File Explorer window. When you release your mouse button over either folder icon, the contents should automatically appear under My Computer.
Once you see those files appear in File Explorer, right click on either.CSV or.XLS and choose Open With followed by Notepad. In my case, I chose Notepad since not everyone has Office installed.
Now you might think that after opening up one of the CSV / XLS files, you would simply be able to edit it directly in Excel without needing Word. Unfortunately, if you try to make changes directly in Excel, it doesn't know what kind of formatting was used originally to store certain columns' values. For example, if someone had entered the name column in cell A1 instead of A2, Excel thinks there is no value stored in that particular cell and displays an error message dialog box. So before editing anything, save a fresh version of your spreadsheet with the same title as your original document but preceded by ".bak." At least, that way if something goes wrong while importing your.XLS file into Word, you won't lose everything.
After saving your modified version of the.XLS file as "New Mailing_List.xls," double-click on its tab name to launch Word. Now that the old.xls file isn't selected anymore, you shouldn't encounter any errors when trying to enter text into cells. But wait! Before continuing, take note of where your cursor currently sits. It likely rests somewhere between cells B3 and C7.
Next, navigate back to the.CSV or.XLS file still sitting on your screen. Click anywhere inside the rows of numbers that represent your contact records, and then hold down Shift + Ctrl keys together on your keyboard. Your cursor should now shift to the very last row containing the titles of your contacts. After doing this, you may notice that your entire worksheet appears blank except for the table header. That's normal. Just ignore the rest of the empty rows until you run through Step 3 again.
When you finally reach the end of your worksheet, highlight the entire block of cells containing your contact info and press Enter. Once again, your entire worksheet should turn blank aside from the table header. From here on out, all you'll need to do is fill in additional text fields as needed.
For instance, if you only want to send a letter to a small subset of your recipients, you'd leave the blocks of numbers representing those individuals alone. However, for others who fall outside of your desired target audience, you may wish to modify their entries accordingly.
In addition, you should also pay attention to how often you plan on repeating similar sets of data. Consider adding more instances of your chosen headers/titles to avoid confusion. And whenever possible, always format your individual subject lines using bold font, italics, or some variation thereof. Otherwise, readers may find themselves unable to tell the difference between your actual messages and the random strings of characters they read otherwise.
As soon as you finish entering your intended content, head straight to the Home menu bar located above the Ribbon panel and look for Tools " Manage Fields. Select Mailed Records from the dropdown menu to view your newly created spreadsheet. As shown below, you should see three tabs on the left side labeled Contact Info, Address Book, and Labels. All of these sections are self explanatory, but if you ever encounter problems, feel free to refer to the following instructions.
Next, we'll tackle sending a group email from Excel. Like with the previous step, go ahead and launch Word manually if you haven't already done so. Once you locate the Contacts section of Word's main interface, hover over Group #1 in the upper portion of your screen until the blue rectangle surrounding said entry highlights. Next, hit TAB twice to move to the next field. Keep pressing TAB continuously until you get to the bottom of the page. There you'll find several options for selecting whether you want to assign each member of your group to specific categories or not. Choose whichever option suits your needs best.
Then scroll down past category selections until you come across the Send via eMail checkbox. Hit TAB on your keyboard four times until you arrive at the Create New Message area. Here you'll find several choices including Subject line, Reply-to address, and Attachments. First, decide whether you want to attach any images, videos, audio clips, etc., to accompany your email.
While most users probably aren't interested in attaching photos, video, or audio clips, it can certainly help increase response rates if you happen to be communicating with a particularly busy department. On the other hand, if you're offering a discount coupon code for a product or service, perhaps showing a picture of said item is enough motivation for potential customers.
Click on the Browse... button underneath the Attach Files heading to pick whatever media file you wish to insert into your outgoing message. Remember, however, that you'll need to provide Word access to your local machine in order to upload pictures or videos.
Finally, continue scrolling down towards the lower half of your screen until you spot the Compose Area. Underneath the Text Box, you should see an arrow pointing upwards. Pressing this symbol allows you to customize your email message further by clicking away from the default template provided by Microsoft.
You can change the colors, fonts, background color, and much more. Use your newfound power wisely by experimenting with elements until you achieve the results you desire.
Just remember not to spend too long tweaking things around -- the point of this exercise is to streamline the creation and distribution of your email ASAP. When you eventually get around to printing out your final masterpieces, you should give yourself plenty of room to maneuver. Since your personal style tends to vary depending on your mood or current situation, you may want to adjust margins accordingly.

Yes, you can. But unfortunately, you cannot simply cut & paste your Excel recipients into Outlook. Instead, you'll have to follow the steps outlined earlier in this guide to transfer them into separate Word tables. Afterwards, you can copy and paste those Word tables into your Outlook inbox.
Alternatively, you can also convert your Excel contacts into vCard files. Simply perform a Google search for VBA Converter [http://www.freevcardconverter.com] and then download the appropriate tool. Using this converter, you can effortlessly transform your Excel contacts into vCards. Then, with the assistance of the previously mentioned website, you can sync those vCards with your mobile device. Finally, install CardDAV Sync for Exchange Server from http://syncforexchange.codeplex.com/releases/. Make sure you set up synchronization beforehand, and you're good to go!
However, if you prefer using Outlook's native functionality, you can actually transfer your Excel contacts into an HTML file directly within Outlook itself.
First, head to File " Options " Trust Center " Privacy Options. Scroll down until you see the Data files section and expand it if necessary. Locate your Excel file and select the radio button beside Allow programs to ask me what I want to do with embedded objects. Next, click OK.
When you're working with large lists of contact information, it's easy to forget someone or something important -- and when you have thousands of people to contact, there are bound to be some omissions. If your company uses electronic communication such as email for all internal correspondence, why not take advantage of this technology by creating a mailing list right inside Excel? You'll never need to open up Outlook Express again!
Creating a mailing list is relatively simple. All you need is a way to import the names and emails of the recipients into one place so they can easily be organized and distributed via e-mail. Once you've got everything set up, you can begin sending out bulk messages without ever leaving Excel. Here's how it works...
You may already know how to link Excel and Gmail together if you created a Google Contacts account earlier. But what about adding more than one person per line? In order to accomplish this task, we will need to insert additional fields (like phone numbers) into our existing Contact Sheet. We will also need to change the format of certain cells in order to get them ready for importing into Gmail.
1. Open the Excel file containing your Contact List.
2. Select "Data" from the ribbon menu at the top of the screen. This brings up the Data tab where you should see two icons under Tools -" Text to Columns Wizard. Click these tools and select Convert Multiple Cells to Rows from the dropdown box next to Choose Table Type. Then click Next. This takes us through several screens which allow you to customize your CSV/Excel table before converting it into rows. When you reach the end, make sure to check off Create Separate Field for Each Delimited Cell.
3. Now let's adjust the settings within those new columns so we can import those records properly into Gmail. Go back to the Data Tab and double click on the column holding the text entries. A window called Options appears. Change the following options according to your preferences.
4. Under Formatting, choose Comma as the delimiter because it's most commonly used across different applications like Evernote, Quickbooks, and Office 365. Also, don't include any spaces between field values. These characters could confuse other programs reading the imported data later on. Leave the decimal places alone unless you plan on including decimals in your cell values. Finally, uncheck Use space as separator since we only need commas separating individual field values.
5. Save changes.
6. Double-click on the row representing the entry for each record you wish to import. The program automatically inserts the necessary code to convert those single cells into full lines. It does this by selecting the entire contents of a particular cell and pasting them over the original value. That means that the converted line will contain whatever was in the cell above it plus whatever else happened to fit below it. For example, if you had three separate entries for John Smith, you might end up with something like this:
John Smith
Email Address
123 Main St., Suite 1A
Now here comes the tricky part. Since we changed the formatting on the previous steps, Excel has no idea that you actually intend to put multiple entries for each name. So, after you run the conversion tool, you may find yourself left with extra blank cells instead of one long string for each recipient. Don't worry though, just go ahead and fill those blanks in manually. Do the same thing for every other column on your sheet except the last one which holds the subject line. Make sure you leave enough room for the actual message body.
7. After you finish filling in the rest of the empty cells, highlight the whole section and press F9 to update the AutoFilter rules. This ensures that none of the remaining cells accidentally become filters themselves. Hit OK once you confirm that everything looks good.
8. Now that you've finished preparing the data for importing, it's time to save the updated version of the workbook. Right-click anywhere on the Ribbon and select File-"Save As. Give it anything descriptive, but keep it extremely basic so that you remember exactly what it contained. Something like MyWorkBook would be best. Then head down to the Book Menu and select Close & Load Workbook. This opens the main dialog box for opening documents. Select Browse.... and locate the document you saved previously. Hit Yes when prompted.
After a minute or two, Word will load your newly completed Document with all your data neatly arranged according to the layout you specified.
Yes you can! However, you won't be able to simply drag and drop the exported file onto your desktop. Instead, you will need to copy and paste it into another location. First, navigate to C:\Program Files\Google\googlecontainertools\convertcsvtoxml.exe. This is located in the folder labeled Utilities. Inside, you will see a command prompt window asking you to specify the path to your.CSV file. Just type in the location of your document and hit enter. Your computer will ask whether you really want to continue. Click yes.
The converter generates a new XML file. Copy and paste it somewhere convenient, perhaps in your Documents folder. Navigate to its location and rename it to the filename you gave during the conversion step. Now you can move onto the final phase of getting your Excel Address Lists ready for distribution.
First things first, you will need to log into your Gmail account. If you aren't logged in, sign in now. Head to gmail.com and look for the blue horizontal bar at the very bottom of your browser. Click that icon and follow the prompts until you arrive on your inbox page. On the upper right corner of the pane, scroll down until you see the gear icon. From here, select Settings.
From the resulting pop-up menu, select Manage Labels. You'll notice a few new boxes appear beneath Default Mailbox. Check New Label and give it a sensible title. Paste the Email Addresses that were generated by the Converter utility directly into the appropriate box. You should now see them listed underneath the default mailbox. Repeat this procedure for all of your desired labels.
Next, head to www.gmail.com and compose a new email. Be sure to include all of your labels in the BCC field. Send it to everyone whose email addresses you added to your labels. Wait 30 minutes for their responses to come in.
Once you receive replies, go to your Sent Items folder. Highlight the email sent to your recipients and click Edit Messages. Scroll down until you see the Message header saying "Sent By [Your Name]" and delete it. Replace it with your own customized signature. Delete the Subject Line too.
Finally, return to your inbox and mark the thread as read. With luck, you should soon start receiving copies of your carefully crafted letters.
Are you tired of manually adding your contact information into every single piece of correspondence you write or receive? Or are you looking for an easier way to manage all of those business cards, letters, postcards, brochures, etc.? If so, you may have heard about using Google Contacts as your master database of personal info. But what if you need more than just addresses and phone numbers? You could always import them into Excel and make a new tab with their names, but there's probably some type of automation you'd like to take advantage of -- maybe even something automated enough to be able to run once per week or month. Well, here we will show you how it is done!
First off, let us explain exactly why this method might come in handy for you. We'll go over several different ways to distribute bulk emails (emails sent via Mail Merge) by creating mailing lists out of existing spreadsheets. This lets you automate sending out large batches of letters without having to enter any additional details yourself. In addition, it also allows you to update that same list at least weekly, which is much faster than updating individual records one-by-one. Once you get comfortable setting up these scripts, they become very useful tools in your office productivity arsenal.
But before getting started, keep in mind that you don't necessarily need to use Excel for this task. There are other applications where you would be better suited. For example, if you're trying to automatically generate labels for incoming packages, check out our guide to creating automatic shipping labels in USPS' official API. And if you want to create a similar script for Amazon Prime shipments, see our guide to automating free two day shipping orders.
For now though, let's move onto actually automating things in Excel.
The simplest solution is simply to export your current contacts list as.CSV file format and transfer it to another application such as MS Access. However, since most people already store their contacts within Gmail, Google Drive, or Dropbox, exporting directly to CSV isn't really necessary. Instead, we recommend uploading your entire contacts list to either Google Contacts or OneDrive, both of which allow you to upload files up to 100 MB total size. Then select "Contacts" when prompted, followed by clicking "Export." It should pop up a window asking you whether you wish to download the CSV file, which you can then copy over to Excel. Alternatively, if you prefer not to upload everything to cloud storage, you can still access your contacts through Sheets. Select File---"Make A Copy..." and choose Create New Worksheet.... From there, you can browse around to find whatever folder has your old contacts list.
Once inside, right click anywhere on your desktop and select Open With... Choose the option to open the document with TextEdit, and paste your old contacts list into a text editor. Save that file somewhere convenient and accessible, and head back to the main screen. Now, try opening up the newly created Contact Sheet worksheet in Excel. Your original contacts list should appear under Sheets---"Contact List," along with imported copies of your contacts. Note that because this feature exports only certain fields, you won't notice too many differences between your exported and imported versions. Also note that importing contacts requires you to input all of their corresponding names and birthdays.
Now that you've got the basics down, let's start writing some code.
Yes you can! Just follow pretty much the exact same steps outlined above for Google Contacts except instead of selecting "contacts" during the Export step, pick "mail". Once again, you will end up with a few extra columns containing various types of contact information, including name, street 1, city, state/province, zip, country, extension, mobile number, fax, title, department, company, URL, notes, birthday, gender, location, website, and signature. So far, however, we haven't been able to successfully pull in anything beyond extensions and titles.
As a workaround, you can edit the ImportedPerson object itself to include additional values, such as birthdates. Here's how to do that. First, double-click on column F1 ("Extension") on your ImportedPeopleSheet. Next, press Ctrl + C to highlight the whole thing, then hit Ctrl+A to activate the Find & Replace tool. Type in ".0" after Extension, and replace all instances of Extension with ".0". Click OK, and repeat the procedure for every field you want to convert. After doing so, you should see that Birthdate appears next to each person entry. Unfortunately, this doesn't work quite well yet, as there seems to be some sort of bug preventing the system from recognizing dates properly. Still, it does provide a decent alternative for anyone who wants to extract birthdates.
Note: These instructions were tested on Windows 10 Enterprise edition 64 bit running Office 365 ProPlus version 1607. Other editions may vary slightly.
While it may seem impossible to obtain your recipients' full postal addresses in order to send out letters via Mail Merge, thanks to Gmail, it doesn't have to be. By utilizing a simple VBA function called Split(), you can split apart strings based upon specific delimiters. As long as you know the correct formatting to search for, you can parse out nearly any relevant string.
Here's what you'll need to do:
Open up the contacts sheet in Excel
Select Tools---" Developer menu item
In the sidebar, navigate to References---" Microsoft Scripting Runtime
Double-click on Shell
Choose Function ImportName()
Input the following line of code: =Split(F4,' ')(2),16
This command splits apart the recipient's email, searches for the second space character, extracts the remaining characters until the 16th space, and returns them as an array.
Next, you'll need to set up a button on your form that runs the following macro:
Private Sub CommandButton1_Click()
Dim myMailApp As Object
Dim rngTo As Range
Set myMailApp = GetObject("new", "Outlook.Application")
On Error Resume Next
With myMailApp
Set rngTo =.ActiveWindow.Selection.Address
End With
myMailApp.SendEmail _
("youraddress@gmail.com", rngTo)
If Err <> 0 Then MsgBox err.Description, vbCritical
End Sub
You can easily modify the Macro above to fit your needs. Some examples include extracting the City and State/Province from the Address Line 3 section, parsing out the ZIP Code, and using the Extraction Method described earlier to retrieve the rest of the pertinent information. Using the Extract Property Wizard will help you determine which properties to extract from which cells.
Another important issue worth mentioning is ensuring that your recipients' emails don't contain extraneous information that may confuse the Mail Merge process. Make sure to remove things like "Reply to:" and "Sent from my iPhone" lines. Otherwise, if you happen to misspell someone's name, the resulting letter will likely arrive at their spam mailbox instead of to their actual inbox.
Even though you have previously extracted almost all of your intended recipients' information, you may still require assistance with finding their associated email addresses. Fortunately, you can accomplish this using the LookupNamesFromExcel utility located within the Utilities subfolder. Simply load up the appropriate Excel Workbook containing your contacts list, then follow the wizard's prompts to perform a lookup. Be careful not to accidentally look up incorrect entries. When finished, you will return a collection of email addresses contained within your selected range.
Simply select the desired range of rows, open up the LookUpNamesFromExcel utility, and point it towards your contacts sheet. Press Enter to begin processing. Keep in mind that sometimes users may have entered duplicate emails due to typos. If this happens to you, you can skip the duplicates by pressing CTRL+D while the program scans.
 Send emails at scale

