 NEW: BrowserGrow.com is now available!
AI agents to grow your business & do your marketing on autopilot in your browser
NEW: BrowserGrow.com is now available!
AI agents to grow your business & do your marketing on autopilot in your browser

NEW: BrowserGrow.com is now available!
AI agents to grow your business & do your marketing on autopilot in your browser

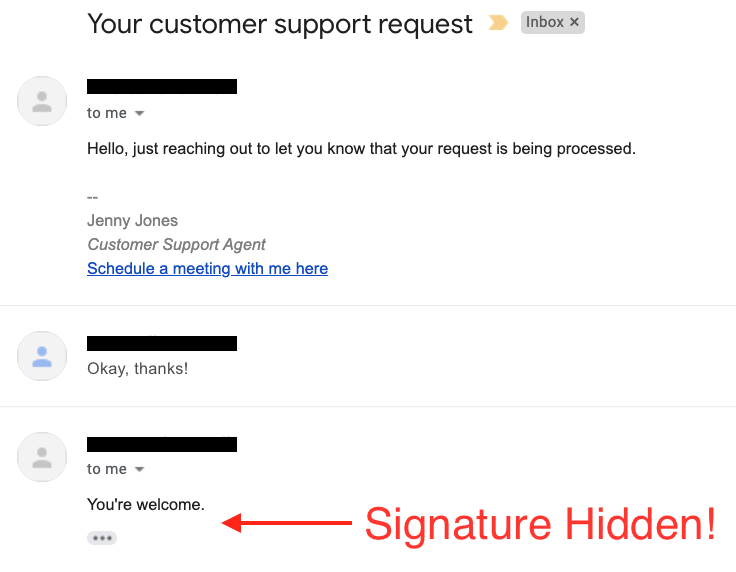
If your job requires that you send emails, then it's likely that some of those emails will get sent using Google Mail (formerly known as GMAIL). If so, you'll probably want to know how to add a custom "signature" or "auto signature" to each message you compose. A signature can be anything from text to an image — here are just a few examples:
Your name
Company information
Social media profiles
Links to other sites
This article will walk you through setting up a Gmail signature easily. You’ll learn exactly what kind of signatures work best, which ones are most appropriate, plus see how easy it is to customize one for yourself.
For more on adding custom signatures to Outlook messages, check out our previous post: How Do I Add A Signature To My Email In Microsoft Outlook 2007 & 2010?
First things first, let's start by creating a new Gmail account if you don't already have one. Once you've added your account details, go into settings and click on the Forwarding and POP/IMAP tab at the top of the screen. Scroll down until you find the Accounts section and select Create Account.... This brings us to the next topic...
When composing an email, always keep these points in mind:
Be Concise: The subject line should only contain essential keywords about the content of the email. Don't use too many words. Also make sure the length doesn't exceed 72 characters.
Keep It Brief: Keep your sentences short but not overly wordy. Use active voice when possible. Write in complete sentences without runon words or punctuation. Be certain there are no spelling errors. Avoid jargon and industry specific language. Try to avoid abbreviations unless they're widely accepted or commonly used in your field.
Use Proper Grammar: Make sure all proper nouns such as company names, products, etc., have been spelled correctly. Check for any unnecessary phrases and replace them with simpler wording. For example, “I look forward to hearing from you soon!” becomes “Please contact me ASAP.” Pay attention to capitalization, especially around business titles. Capitalize the very first letter of every sentence including acronyms. When writing emails, stay away from passive voice. Passive voice makes your reader feel confused because he has to read between the lines to understand what action was done by whom. Active voice keeps everything straightforward and obvious.
Avoid Exclamation Marks!: Unless necessary, try avoiding exclamation marks! They tend to weaken the impact of your email. Instead, use question marks instead. Using exclamation marks tends to cause readers' eyes to jump over parts of your email.
Write With Clarity: Writing cleanly helps people retain important information. Your grammar and diction must be correct. Ensure your English is clear and concise. Remember, less is often more.
Formatting: Formatting means arranging elements within the body of your email according to style guidelines. These include fonts, font size, paragraph spacing, indentation, bullet lists, italics, bolded text, hyperlinks, URLs, block quotes, attachments, tables, embedded files, etc. Always remember to follow basic formatting rules. One way to ensure consistency is by consistently using a standard typeface throughout your documents.
Include Attachments: Include relevant file attachments if needed. Never attach multiple copies of the same document. Send only one copy of the original document. Sending multiple copies could result in double charges.
Don't Forget About Signatures: Most employers prefer their employees to sign off their emails with a personalised signature. Before sending off your email, take care to format your signature properly. First, decide whether you would also like to include a logo. Next, consider whether you'd like to include additional information. Finally, decide how much space you would like to devote to your signature. Depending upon the nature of your job, you may wish to include social networking icons, website addresses, phone numbers, e-mail addresses, and even fax numbers.
Signatures usually consist of two sections - the left side typically includes basic contact info while the right contains optional flair items. However, the left hand column cannot be changed since it displays the default signature created during setup. Here is where customization comes in handy. We’re going to show you how to change the left hand column to something more personalized later in this tutorial. But before we proceed further, here's another quick tip: never put spaces in your signature. Doing so might break the layout.
The following types of signatures seem to work well depending on the position held by the sender.
1) Company Name + Phone Number: This signature works great if the sender runs his own organization. He can simply list his company name followed by his telephone number. Sometimes, however, companies choose to hide their real identity under false identities. So, if you're doing this, make sure you still leave enough room for contact information.
2) Contact Information Only: This is good for freelancers who aren't part of a large corporation. Simply provide your full address and phone number.
3) Full Address: Some businesses require their employees to supply home addresses rather than cell phones when signing up for a cellphone plan. As a general rule, providing your home address gives clients confidence that you live somewhere, thus making them feel better about hiring you.
4) No Personal Details: Many times, individuals don't want others peeking inside their lives outside of work. Therefore, it's common practice to omit personal data. Leave the house number blank. On the flipside, though, if you're applying for a job, it's wise to disclose your personal address.
5) Social Network Links: If you frequently communicate via Twitter, Facebook, LinkedIn, Instagram, Pinterest, Tumblr, YouTube, Flickr, Foursquare, Yelp, TripAdvisor, Digg, StumbleUpon, Reddit, Snapchat, Vimeo, and other networks, then you should definitely display your profile link(s) prominently below your email signature. People browsing these platforms are looking specifically for accounts associated with your profession. Adding your social network links allows users to quickly connect with you on various online communities.
6) Website Link: Similar to displaying social network links, sometimes it's beneficial to add websites directly underneath your email signature. Users browse web pages looking for solutions to problems related to their interests. By having a direct link to your site, customers won't need to spend time searching for it. Plus, you'll receive increased traffic because search engines index your URL automatically. Just be careful to not overload visitors with tons of clutter.
7) Blog Postings: Another excellent option is to place blog postings beneath your signature. Providing a link back to your latest posts shows potential customers that you're actively engaged with them. Customers appreciate being acknowledged for opting into your mailing list. And if you have interesting topics or stories to share, putting them beneath your email signature provides your readership access to fresh material.
8) Quote: Including quotations or inspirational sayings is a nice touch when you're trying to convey professionalism. Quotations are particularly useful for writers and editors who deal with sensitive issues regularly. For instance, "You Can Do Anything, Even Change History!" proves that nothing is impossible. Or perhaps, "Life Is Short – Live Well." Both statements encourage positive thinking and self-improvement.
9) Photo: While photos are far from becoming passé, they are certainly effective tools to help promote brands. Displaying your photo beside your email signature tells users that you actually possess a face and give credibility to your brand. Additionally, users will perceive you as trustworthy because you're willing to expose your true identity. Plus, consumers love seeing pictures of themselves.
10) Video: Videos are hot trends nowadays. Consumers enjoy watching videos and sharing them across social networks. Having a video clip alongside your email signature creates instant awareness amongst viewers. After viewing your video, your target audience will associate your personality with your product. That association ultimately increases sales and leads.
11) Business Card: This is a classic method of promoting your services. Just paste your card onto your outgoing mailer. If someone wants to reach out to you, she knows how to locate you based on your physical appearance alone.
12) Other Items: There are plenty of other things you can add besides photographs, videos, and cards. Consider incorporating logos, QR codes, badges, certificates, awards, pins, tickets, stamps, maps, charts, graphs, infographics, and other visuals.
13) Customized Signature: Lastly, you can choose to design a signature manually. Designers can either sketch a template or import an existing background design. Then, artists can fill in individual graphics and shapes with color. If you don't have any graphic designing skills, you can hire a designer to handle this process for you. Hiring designers isn't difficult—all you have to do is advertise the project and wait for applications.
Now that you have seen several different ways to craft a professional email signature, it's time to pick your favorite approach. Hopefully, after reading this article, you learned everything you wanted to know about crafting a perfect signature. Now, all you have to do is apply it.
You’re probably familiar with the concept of setting your name, address, phone number (and even fax) as your “signature” when sending an e-mail or letter. What you may not know is that there are many ways to spruce up those boring signatures—or make them more useful for business communications.
We'll show you how to use Gmail's tools to add flair to your basic signatures so they're attractive and relevant to both personal and work situations.
First off, let’s discuss what exactly goes into a signature. Most people think it contains just their first and last names, but that isn't always true. A good rule of thumb is that if someone would want to give you a hard time about receiving a message from you, don't put anything in your signature other than your name and contact information. Your goal here is simply to provide enough identifying details for others to find your account on LinkedIn, Facebook, Twitter, etc., or at least get your company website link handy. You also need to include any necessary keywords related to your industry. For example, if you own a landscaping company, including "landscaper" or "gardener" in your signature might help someone search Google for services nearby. If you have multiple jobs, try using bullets to separate each one.
There are some things you definitely shouldn't include though. Don't include social media handles such as Instagram, Snapchat, or Facebook pages. These will only serve to confuse recipients who aren't interested in following you on these sites. Also avoid sharing too much personal information. For instance, don't share where you live unless you trust the person you're corresponding with. And don't share sensitive financial info, which could jeopardize your job security!
Now that we've got the basics out of the way, let’s move onto creating a custom signature. We recommend starting by clicking Settings & Accounts then Create Account. Once you log into Gmail, check the box next to Save draft to disk. This lets us save changes so we can edit our new signature later without having to delete everything and start over again. Then click More settings below the profile photo on top right corner. In the General tab, scroll down until you see Signature field. Click Edit under Plain text signature.
This opens another window containing your current plaintext signature. To change it, click Change. Now type in whatever you'd like to appear in your signature. Make sure to remove all unnecessary words, as well as any passwords or private data. When you finish, hit Save Changes at the bottom. Next, go back to the previous page and select Upload image instead. Choose an appropriate file size for your signature. The recommended dimensions are 300 x 150 pixels. After uploading your logo, choose the position and drag it wherever you wish within the editing area. Hit Done once you’ve selected the correct location. Finally, enter your desired password/phrase and confirm it.
Next, go back to the main screen and look for Text formatting options along the left side menu bar. Select Font Size and Colors for now. Increase font size slightly and turn colors blue to match Gmail branding. Under Header Styles, click Add style. Name your signature header and select Custom HTML Code. At the end of the code, paste in your desired hyperlinks.
For example, say you run a law firm. You might want to write something similar to, "[Your Firm] | Contact Us," making the brackets stand out clearly. Highlight [your firm], replace the space between | and Contact Us, and copy everything else as-is. Now repeat this process for every link you want to include in your signature, adding different highlights per item.
If you want to include certain phrases in your signature, you must highlight them separately using the same method. Let’s say you work for a consulting agency called Vibrant Consulting Services Incorporated. You might want to write something like "Vibrant Consulting Services Inc." followed by "| Call 888.555.5555". Just keep in mind that anyone searching for your company on Google or Bing will still see your full legal name. So if you plan to include your middle initial, it needs to be typed directly after your given name.
After you’ve finished, tap Download Image to download your finalized signature. Go ahead and open it in Notepad or Word and clean it up a bit. Then export it to.PNG format and upload it to Dropbox. That way you won't lose access to it if you ever forget to update your signature.
To make adjustments to your signature while typing, hover over the existing text and press Spacebar to bring up the popup menu. From here, click Insert Link... and paste in your desired URL. Repeat this process throughout your entire signature. It works similarly for inserting pictures and videos, although you cannot adjust their positions during typing.
While most companies ask employees to limit the amount of exclamation points used in emails, you can actually increase yours if you want. However, doing so can cause problems with spam filters. Instead, stick to two to three dots depending on whether you prefer subtlety or shock value.
Let's talk about what to include in a professional signature. First, use bullet points whenever possible to break long sentences so they fit better in your allotted space. Second, be mindful of the order of items. Generally, list your name, title, company name, and contact information, with additional fields appearing further down the page.
Also consider giving yourself room for creativity. Try experimenting with fonts and color schemes. There are countless examples online for inspiration. Here are a few ideas for fun and functional signatures:
[Company Logo] + Email Address
Name Surname @ Company Website
Business Hours Phone Number Fax Number
Email: Businessname@companydomain.com
[Your Full Legal Name] + Personal Information
Job Position / Department Manager Job Title Salary City State Zip
Personal Interests / Hobbies Education History
Professional Experience Achievements Awards Recognition
LinkedIn Profile
Finally, remember to regularly review your signature. Sometimes changing a single word can improve its appearance dramatically.
With a little practice, you'll soon become a master of crafting eye-catching email signatures. Happy writing!
Gmail is one of the most popular web tools available, but it's also not very intuitive for those who aren't tech savvy. Luckily, there are some basic things that everyone can do—like setting up signatures—to make their online experience even better. We'll show you exactly what you need to know.
In this article we're going to walk through everything from start to finish on creating your own custom Gmail signature so you always have something written at the bottom of every message you send out. Once you've got the hang of writing a professional signature using Gmail, you might consider trying these other helpful services or apps too.

When people think about email signatures they usually imagine printed documents (or sometimes just text) included as part of the envelope when sending mail. But today, more than ever before, emails are used for business communications — whether personal or official — which means your digital signature needs to be a lot different than traditional paper correspondence.
Your new email signature will serve two purposes here: It will act as both a contact form and a bio page. That way, instead of typing out all the information yourself each time someone reaches out to get in touch with you, you can simply click over to your inbox to see if your recipient has already filled out his/her details. You can then respond quickly without having to open another app. If needed, you may want to use a separate tool specifically designed to help you manage contacts, such as Aweber, Mail Chimp or Constant Contact.
So what goes into your profile? Here are five tips to keep in mind while building yours.
1. Use good grammar. Whether you prefer handwritten formatting or typed words, proper spelling and sentence structure go a long way towards making sure your reader doesn't feel bombarded by any errors. Don't worry though, if you don't know what punctuation marks to include, Google Docs makes that easy. Just type in a question mark followed by whatever follows after it. For example, if you wanted to ask where someone lives, add?lives= followed by your city name.
2. Give readers enough space between paragraphs. One thing you definitely shouldn't forget is white space. When composing signatures, try giving your recipients plenty of room within sentences. This helps them read your thoughts clearly and allows them to breathe easier between ideas.
3. Consider including pictures. While a few graphics could really spice up your document, remember that people often scan messages nowadays. So unless you plan on uploading an image file, stick with plain old text only. Not only is it faster to load, but it's much less likely to confuse a viewer who isn't familiar with graphic design standards.
4. Make it clear what kind of content you'd like to receive. In addition to providing contact info, many companies now require job applicants to submit a cover letter along with resumes. Since letters and essays tend to follow similar themes, you probably won't have trouble deciding what to put down once you decide what to say. However, it's still important to give folks a heads up regarding what kinds of questions you typically answer. Or maybe you'd rather focus on the areas you excel at professionally. Whatever you choose, it's best to let potential employers know upfront, especially since they'll most likely review your resume later if you apply.
5. Remember to proofread! No matter how careful you were during composition, mistakes happen occasionally. To ensure you don't misspell names or leave out key terms, run your work through several times until you feel comfortable that no typos slip past you. Also check for anything that seems irrelevant like extra spaces or odd font choices, as well as unnecessary wording. Afterward, save your draft and compare it against others to see if anyone else noticed any issues. Then, upload it to your account once you reach 100 percent completion.
Now that you understand why you need a signature and what it entails, let's move onto the nuts and bolts of actually putting together your own.
There are a couple ways to approach this problem. First, you can opt to copy and paste your company logo right under your name. Second, you can either list your title or describe yourself in greater detail. Either method works fine. The main point is to provide a quick overview of who you are and what you can offer. Of course, depending on your line of work, you can also go ahead and explain your role within the organization.
If you find that listing your title sounds boring, you can always turn it around by saying something like, "I'm happy to discuss our services further." By doing this you're essentially inviting conversation, which brings us to tip number three...

It's extremely important to remember that your goal is to attract attention to your business brand and make it appear as though you're eager to connect with whomever writes to you. There are a variety of elements you can incorporate into your signature. Some examples include the following:
A short paragraph explaining your role
Headings
Quotes
Information boxes
Images
Videos
Links
You can also use specific colors and fonts to emphasize certain parts of your profile. And while you certainly don't have to fill your entire signature, it's smart to keep it neat and tidy because viewers will spend fewer seconds scanning it. Plus, unlike lengthy descriptions, photos and videos allow your audience to draw conclusions quicker.
Finally, in order to make your signature stand apart from the rest, it's recommended that you avoid copying prewritten templates. Instead, customize it based upon your individual preferences. As you gain more confidence, you can continue adding pieces to it to reflect changes in position or responsibilities.
Most professionals would agree that the easiest place to begin is by taking the shortest route possible. Simply state your full name and phone number, followed by your affiliation. Next, go ahead and list your current address if you wish. Finally, hit enter twice to complete the section. Below that, you can mention your e-mail address and website URL if applicable. Lastly, go back and fill out any additional fields that seem relevant.
Afterwards, you can choose to skip straight to completing your bio. Otherwise, scroll down to the next section. Within that, you can expand on your previous sections by adding headings, subheadings and bullet points wherever necessary, allowing viewers to skim through easily. Feel free to remove portions that sound repetitive or uninteresting.
Remember that while your goals are to attract interest and build relationships, you don't necessarily want to come across as desperate. People generally respect folks who hold steady jobs and treat them fairly. With that said, however, you should never neglect to highlight your skills whenever possible. Even if you believe that you're currently employed somewhere, always promote your availability and willingness to explore opportunities elsewhere.
Next up, we'll talk about editing your signature to its final stage.
Once you've completed your finalized version, don't overlook the importance of testing it out. Head over to gmail.com, log in and compose an email. Fill out the subject field but nothing else, then press Send. Notice how your signature appears beneath it. Now, switch accounts and repeat steps four and five again. Compare the results to your original draft and adjust accordingly. Keep repeating this process until you feel confident that your finished product looks great. Afterwards, save the updated version and test it out with friends and colleagues. Take advantage of feedback sessions to determine any last minute revisions.
Editing Your Signature
While perfecting your signature is essential, maintaining it throughout the years can prove difficult. Fortunately, Gmail offers users the ability to edit existing profiles. Go to settings & general tab. Scroll down to the bottom of the screen and select Edit Profile. From there, you can replace background images, change styles and tweak color schemes.
To access these options, select Change Theme. On the left side, you can view various icons and categories that represent distinct designs. Select whichever one suits your tastes and proceed onwards. At the top of the window, you can alter your profile picture and update your gravatar.
Lastly, it's worth mentioning that you can delete unwanted entries via Settings & General Tab. Click Manage Profiles, then look through your history and delete any outdated ones.
 Send emails at scale

