 NEW: BrowserGrow.com is now available!
AI agents to grow your business & do your marketing on autopilot in your browser
NEW: BrowserGrow.com is now available!
AI agents to grow your business & do your marketing on autopilot in your browser

NEW: BrowserGrow.com is now available!
AI agents to grow your business & do your marketing on autopilot in your browser

You've got an email notification that you need to send out, but there's just one problem—there's no way for you to get their details into your system! You're stuck with "No Contact Details Available" on this person's record... unless you know how to use HubSpot's extensive contacts management tools.
In this article we will explain exactly what you can do to fix it when you encounter these frustrating situations. We'll also show you how to set up addresses if they don't already exist in HubSpot (if you haven't yet signed up then check our articles about HubSpot first!).
So let's start by looking at deleting contacts in HubSpot.
To remove a contact from HubSpot, simply open any of its views such as Contacts or Leads. If you want to make sure you don't accidentally delete anything important, be sure not to click anywhere inside those windows until you are absolutely certain you won't hit anything else. Once done, select View All Actions on the right hand side of the screen. From here you should see Delete Selected under Action Type. Click Save Changes and wait while the changes occur. Once complete, confirm all actions were deleted and save again.
If you would prefer to go ahead without saving, try selecting View All Actions once more and choose Edit instead of Delete Selected. This is slightly safer since you might still end up deleting something vital if you mistype. However, please note some actions cannot be undone so be careful where you click next time!
Note: Deleting contacts works differently depending upon which version of HubSpot you're using. For example, in older versions you could only delete people who had never been added to HubSpot before. Now however, you can delete anyone who has ever used HubSpot. To delete someone who doesn't currently have an account, follow the same steps above except type Create New Account in place of Add User. The process is identical after creating new accounts.
HubSpot users can create multiple companies within their own profile. In order to deactivate a user from being associated with a specific company, you must first close that company. This makes sense because if you keep them both active then any emails sent via that company wouldn't appear in their inboxes. Here's how to do it:
Open any view containing the contact whose company you wish to stop showing up in.
On the left panel, locate Manage Companies. Select the Company you want to disable.
Click Remove User. A popup window will display asking whether you really want to perform the action. Confirm it and the company will disappear from all records.
Now that you're free from this particular company, why not assign yourself to another?
Changing the company association is very easy thanks to HubSpot's excellent search function. Simply enter whatever name you wish to call your new business. Use spaces between each word to avoid having to deal with special characters. Then press Enter. Your search results will now list every contact connected to HubSpot with your chosen term. Find the one you wish to switch to and click Change Company.
The page that opens will give you two options. First, you can either drag and drop contacts onto different companies or manually edit the fields. Second, you can automatically transfer everything over by checking the Transfer Users box. If you decide to proceed this way, you will receive an automated email informing you of the upcoming transition. Be aware that users may have pending tasks attached to them, meaning they might miss out on things like newsletter signups.
For most cases though, it's best to take the manual route. When you have finished making changes, click Submit.

There are many reasons why you may need to add an additional address to HubSpot beyond your primary home office. Perhaps you work part time elsewhere and have moved home recently. Or perhaps you run several businesses based around the same premises. Whatever the reason, adding a secondary address is simple enough even beginners can handle. Just follow our step-by-step instructions below.
We recommend doing this before sending out any documents relating to your business, otherwise you risk receiving communications intended for other entities.
1) Open Settings & Preferences.
2) Choose Accounts.
3) Look for Other Addresses in the sidebar menu underneath Emails And Notifications.
4) Click +Add Address.
5) Fill out the form including entering separate PO Box numbers.
6) Check Send Mail As followed by changing your Primary Email to point to whichever address you intend to forward mail too.
7) Tick Always Send Invoices as well as Allow Customers to Request Support as relevant.
8) Finally, ensure the radio button beside Include Additional Information On My Own Documents Is selected.
This allows customers to request further details regarding your services. Without it they will receive nothing apart from basic info like name and phone number.
9) Press Save Changes.
10) Return to your main settings window. Under Messages & Transactional Emails, look for Auto Response messages and tick Show Multiple Responses Per Customer.
11) Repeat for every single customer you wish to include extra responses for.
12) Set Up Subscriptions. Scroll down to Find and Filter Subscribers. Ensure Search Results shows Existing Connections Only.
13) Click Next.
14) Pick your preferred subscription method.
15) Leave Autoresponder Name blank.
16) Go back to Home Screen.
17) Expand Advanced Features.
18) At last, scroll down to Billing Info. Make sure Send Monthly Statements is checked.
19) Hit Save Changes.
20) That's it!
When setting up your HubSpot account, you supplied us with your legal name and registered address. Using this data, HubSpot was able to generate listings for your various companies. However, sometimes you may wish to share your personal details with clients behind closed doors. Alternatively, maybe you run multiple businesses through HubSpot but don't necessarily want them appearing alongside each other in public profiles.
Don't worry, HubSpot makes it possible to hide entire companies altogether. To do this, simply visit your Profile tab. There you will see four icons along the top of your dashboard. These represent Personal Info, Business Info, Clients, and Projects respectively. Hover over any of them and you will spot three tiny dots. By clicking on these, you can toggle whether you want to display said section of content publicly or privately.
As mentioned earlier, HubSpot uses Google Maps to provide localised lists of places nearby. While this means you can easily browse locations near your current location, it isn't always useful. Sometimes you might want to filter results only to areas outside your city limits. Thankfully, HubSpot offers a handy feature called filtering regions.
Simply head to your Preferences and navigate to Filters. You can expand the area covered by this tool by dragging the corners inward. Beneath Region Options, uncheck Hide Places Outside Any Area Of Interest to prevent unwanted results popping up. Remember, you can always return to this option later.
Have you found this guide particularly helpful? Do you have questions about HubSpot that we didn't cover? Let us know in the comments below.
HubSpot's Customer Relationship Management (CRM) software has an easy way for users to split up their contacts into different companies, depending on what they're currently working on with them.
This is useful if someone needs to switch between two or more clients at once. Maybe one client wants to take over negotiations while another handles follow ups. Or maybe your sales team splits up leads by which account manager they should be dealing with. Whatever the reason, splitting up your contacts makes it easier to manage them individually.
But there are some people who may want to completely disconnect their relationship with a particular business altogether. This might happen when a lead changes jobs or when someone leaves the firm. If this person was part of multiple deals, assigning them to a new employer can get messy if you don't know how to handle it. So we'll show you how to delete a contact from a deal in HubSpot.
If you need to remove a contact from a deal within HubSpot Sales & Marketing, here's what you need to know about deleting contacts and reassigning leads.
To delete a contact from a deal in HubSpot, you must first open that specific deal via its tabs. Then click Contacts " Actions " Delete Contact. You will see all current contacts assigned to that deal pop up beneath it. Select the ones you wish to delete and hit OK. Once selected, those contacts will disappear from any other lists you've created and won't appear again until you assign them to another deal.
You can also select multiple contacts using Shift + Click and then hitting Delete. Simply choose whether you would rather delete only certain contacts or all of them. Either option works fine. However, doing so through the regular action menu allows you to filter out individual names without having to check each name manually.
Once deleted, you cannot reverse these actions unless you create a duplicate record yourself, such as creating a copy of a contact before editing it.
Yes! Deleting a contact does not make them go away forever. They stay in your system just like anyone else. But since you removed them from any existing deals, they won't appear under anything except the All Deals list anymore. As long as you didn't change where they were sent, they still exist in the system. In addition, you can always search for them later if needed. Just type their full name into the Find box and scroll down to find their profile page.
Just keep in mind that removing a contact from a deal doesn't erase their information, nor does it unlink them from any contracts or agreements signed previously. They still belong to whatever terms the original contract had set forth and they continue to receive emails and updates from whoever made the agreement.
On top of that, if you ever decide to bring back that same contact, you can add them to a separate deal and modify the old contact details accordingly.
Now let’s say you wanted to move a contact from Client A to Client B. How could you transfer them both in one step? The answer lies in HubSpot’s ability to work across many types of businesses—including service providers, manufacturers, retailers, and others. By adding additional accounts, you can easily transfer contacts throughout your organization. Here’s how:
In your main dashboard view, expand Accounts “ Add Account. From the options available, choose Service Provider/Manufacturer.
Fill in all necessary fields including Company Name, Address 1, City, State, Postal Code, Country, Phone Number, Fax number, Email address, Website URL, Username, Password, Business Type, Industry, Logo Image, Logo Color, Brand Colors, Default Currency, Default Time Zone, Default Language, etc. Make sure to save everything once done.
When you finish filling in the information, look below the dropdown menus next to Billing Method and Shipping Method. There, you’ll see three buttons labeled Create New User, Change Existing User, and Add To Another Account. Hit the last button and HubSpot will prompt you to enter the account info you filled earlier. Choose either Client A or Client B and press Save Changes. Now whenever you access Contacts, you’ll notice that the user appears under a newly added Client B tab instead of his previous one. Below this new entry, note that you now have the opportunity to rename the user.
Finally, you can use the Edit Details link located right above the entry to tweak his appearance further. For example, you can adjust the email signature, update personal preferences, or even toggle auto-replies.
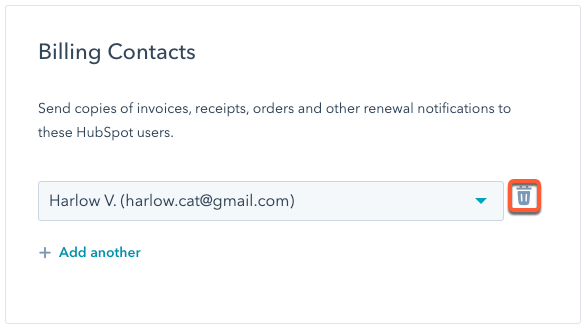
There are several ways you can delete a contact in HubSpot. One of the easiest methods involves selecting the contact and clicking the Trash icon at the bottom left corner of the screen. Alternatively, you can navigate to the person’s profile and hit the Delete icon near the top of the window. Depending on your settings, you can delete them immediately or schedule their deletion after a few days pass.
The latter method is helpful if you plan to permanently remove the contact because you can specify exactly when they’d no longer appear on HubSpot. Plus, you can track their removal separately from any past activities. Keep in mind that the second option requires manual confirmation before finalizing the process.
Lastly, if you’re looking to delete all records related to a certain group, consider importing them to a spreadsheet. Go to Settings and choose Import/Export Data. Under Export Data, click Browse and pick Spreadsheets (.xls). Next, select the file containing all contacts and proceed with exporting them to.csv format. Afterward, download the exported file onto your computer and upload it to Google Drive. Finally, head to File " Open Spreadsheet. Your data should populate automatically and you can delete it all together.
As mentioned above, though, HubSpot keeps copies of contacts in case you decide to bring them back. Therefore, you shouldn't rely solely on this trick to avoid accidentally erasing important records.
Editing deals isn't difficult either. First, go to Contracts " Deals. At the very top of the page, you’ll see the Deal Manager section followed by the active deals listed underneath. Each row displays basic information about every aspect of the deal, starting with the customer and moving down to the most recent activity.
Next to each item, you’ll spot icons indicating various states. These include Pending, Active, Closed Won, Contract Signed, Expired, Canceled, Waiting On Others, and Other. Hover over a state and you’ll see a small tooltip explaining what happened to that specific status. When you’ve finished reviewing the entire list, try changing the Status field to something else. You can also alter dates associated with events or deadlines, plus even rearrange items based on priority order.
Keep in mind that unlike editing contacts, you can’t simply drag and drop deals around. Instead, hover over the desired element and wait for a popup to appear. You can then highlight the rows you wish to move and hit Move Selected Items Up or Down.
If you're using HubSpot, there could be times when you want to move a client between companies or even just split up their contract. While it's easy enough to add contacts as clients within your own organization, what if you don't work at that particular firm anymore? Or maybe they've moved across town and now need to be assigned elsewhere?
Luckily, this is possible via an internal process called "delegating" (or reassigning) a contact to a new company—but only if you know how to do so first! Let's take a look at some of the ways you can delegate someone to a different company in HubSpot...
Deleting the contact means deleting them completely from all lists, which is also true if you deactivate them instead of removing them. If you simply wish to change the company association for one person, follow these steps:
In any list where you have delegated people, click on Show People. This will show all of those who are currently working under that specific team.
Find the contact whose job title matches the department you would like to assign them to. In most cases, you'll find this by searching through the search bar along the top of the screen. Once found, hover over the individual's name until you see the pencil icon appear next to his/her profile picture. Then select Edit Profile & Company Information. You may get a prompt asking whether you really want to make changes before proceeding. Accept this.
On the resulting page, you should see two tabs labeled Delegate and Reassign. Select Reassign. A pop-up window will ask if you want to save changes. Hit Yes then OK. The status column shows whether the update was successful. Your contact should now be listed under whichever company he/she previously worked under. Repeat the above steps for other contacts in the same position. Note that the same approach works for changing the primary account manager for a customer too.
You can always go back into the Contact Management section of Settings to confirm everything has been updated correctly.
This option isn't available to everyone because not every employee needs to manage multiple teams. However, if you do happen to fall into this category, here’s how to do it:
Click on Show People. Find the contact whose job title matches the department you would like to assign them to. Hover over the individual's name until you see the pencil icon appear next to his/her profile picture. Click Manage Teams. You may get a prompt asking whether you really want to make changes before continuing. Accept this.
On the following screen, you should see three options labeled Primary Team, Secondary Team, and Both. Choose whichever corresponds to the department you would like the contact to join. They will automatically start showing up under that team. Repeat the above step for other existing contacts who were added to the wrong teams.
HubSpot recommends creating separate profiles for each team, especially since many employees might have more than one role within the business. Therefore, we advise against merging multiple departments together unless absolutely necessary. To create a new profile, open Contacts, expand All Lists, right-click on your current primary team, and choose Create New List. Give it whatever name you prefer. Now repeat the previous instructions to move existing contacts around without affecting anyone else.
Note that while assigning staff members to certain teams does require admin privileges, changing the company associated with a single user doesn't. Just remember to set the correct default team whenever adding a new contact.

Sometimes you won't be able to use either of the methods described above. For example, perhaps you're looking to transfer someone from Acme Inc. to Foobar Corp., but they already belong to ABC Co.? Fortunately, HubSpot allows users to manually link contacts with organizations themselves. Here's how:
Go to Contacts > Customize Data. On this page, enter the email address of the contact you’d like to map. Make sure to include both “@abcco.com” and “FoobarCorp.com” after the @ symbol. Don’t forget the extra period at the end of the domain. When done, hit Save Changes.
Now head to Contacts > Add Person. Enter the appropriate details about that person including their full legal name, phone number, date of birth, social security number, etc. If you haven't yet created a custom field for contacts, go ahead and fill out Name, Phone Number, Email Address, Date Of Birth, Social Security Number, Gender, Relationship Status, Website URL, Notes, Birthday, Home City, Work Location, Current Job, Followers, Following, Messages, Client ID, Client Secret, and Logins.
Finally, scroll down to Organization and check off Associate With [Organization]. From here, type in the email address of whoever you would like to connect that contact to. Hit Save Changes. That's it! Now you can access that person under whichever company you chose to associate with them.
There may come a time when you realize you made a mistake somewhere during the delegation process. Perhaps you accidentally deleted a contact altogether, or maybe you tried to merge two different firms' accounts together. Whatever the case may be, you can easily change your company info on HubSpot itself. Here's how:
Head to Account Overview. Scroll down to Change Password and log in again. You’ll see a tab titled Update My Info. Under this tab, input your old password and verify your credentials. Afterward, you can switch over to the Secure Passwords tab to generate a new one. Finally, click Submit Request to complete the process.
That's it! Changing your company info shouldn't cause much trouble, though keep in mind that doing so invalidates your SSL certificate.
We hope you never have reason to resort to manual labor—it takes far less effort to let HubSpot handle such situations for you. And once you master its core functions, you'll wonder why you ever bothered trying to roll things yourself. Good luck with your projects, fellow marketers!
 Send emails at scale

