 LIMITED SPOTS
All plans are 30% OFF for the first month! with the code WELCOME303
LIMITED SPOTS
All plans are 30% OFF for the first month! with the code WELCOME303

LIMITED SPOTS
All plans are 30% OFF for the first month! with the code WELCOME303

HubSpot's CRM has been designed for businesses that need powerful tools and features. If your business needs a robust tool like this one, there are some things you may want to know about how to use HubSpot. Here we'll show you how to set up multiple contacts in different lists within HubSpot so you can better manage them.
With HubSpot’s user-friendly interface, anyone who doesn't have any prior experience with using its platform will be able to navigate through the system without having problems. The best part of HubSpot is the ability to customize your account according to your specific requirements. You can also take advantage of various useful functionalities such as templates. In addition to these great features, HubSpot comes with other handy functions if you're looking to make your life easier. For instance, you can easily connect to more than 1,000 apps via Zapier or integrate third party services into HubSpot, including Google Calendar, Mailchimp, PayPal etc.
You can now see below how to configure a new Contact List in HubSpot. When creating your first Contact List (e.g., "Customers"), follow along to learn how to perform these tasks yourself.
1. How do I delete all contact list?
It is not possible to automatically remove a single Contact List at once. However, you can still get rid of each individual list by deleting the whole group. To do that, go to Contacts > Lists and click Delete All. This way you only keep your most important lists while getting rid of others.
2. How do I edit lists on HubSpot?
To update existing Contact Lists in HubSpot, simply select Customize Your Account & Edit My Lists. From here, choose the relevant option depending on what type of change you wish to make. These options include:
Change Account Name - Click Change my name. By doing this, you can rename your account to something else entirely. Alternatively, you could just leave your current display name intact but replace your email address with another domain.
Add/Remove Email Addresses - Click Update next to New Emails. With this function, you can either add or remove email addresses from your account.
Enable Autorenewal - Check Enable AutoRenewal. Doing this allows you to pay monthly instead of annually.
3. How do I add names to a list on HubSpot?
When adding a new person to a list, you can assign him or her a role. There are two roles available in HubSpot—Member and Admin. A Member takes care of managing their own data while an admin manages several users' information. Below is an example of assigning someone the Member role.
4. How do I create a custom list on HubSpot?
If you would like to split your customers into groups, then you should consider creating separate lists based on certain criteria. To do that, go to List Settings and click Create New List. Type in the title of your new list under the field labeled Enter list description. Then hit Save after filling out everything correctly.
5. How do I view all Contact Lists in HubSpot?
This feature lets you access all lists present on your account. Simply log in to hubspot.com, click on Manage Accounts, and look for your desired account. Once you find yours, select View All Lists.
6. How do I export a list on HubSpot?
Here are steps on how to export your selected list(s) on HubSpot. Go to the respective menu item mentioned above and select Export List. Choose whether you'd like to save your list as a CSV file (.csv), HTML file (.html), Excel spreadsheet (.xls), or PDF document (.pdf). Afterward, enter your preferred download location path and press Download. Now, you might think that your exported list won't contain anything because there are no records yet. Well, don't worry! That means that the process hasn't created duplicates of those records yet. Instead, when exporting a record, HubSpot creates a unique ID for that particular entry. Thus, every time you open the.CSV file later, it shows the latest updates on that specific customer.
7. How do I import a list on HubSpot?
There are many ways to bring external data into HubSpot. One method involves importing a CSV file containing records. Follow the instructions below to complete this task.
First, head over to Customers. Select Import Data on the right side panel. Next, upload the CSV file and optionally adjust any settings related to fields and labels. Hit Continue after making changes. Finally, review the summary page and confirm before clicking Submit. Note that HubSpot converts imported columns into internal IDs. So, if you plan to link external data back to original sources, make sure they match the corresponding column numbers. Otherwise, you may run into errors.
8. How do I merge contact lists in HubSpot?
Sometimes, even though you've removed unwanted entries from a list, they end up reappearing again due to duplication issues. Before merging lists, check both sets for duplicate values and eliminate identical ones. Then, proceed to the Merge Lists button located directly beneath the header tab.
9. How do I turn off auto renewal on HubSpot?
Auto renewals allow companies to charge clients automatically, rather than requiring them to submit payment upfront. It also helps you avoid late fees and penalties. Unfortunately, sometimes people tend to forget to cancel their accounts during the annual billing period. Therefore, HubSpot gives you the chance to pause automatic payments until you decide otherwise. To do that, go to Customer Service & Billing Preferences. Under Subscription Options, uncheck Pause Payment.
10. How do I enable two factor authentication (2FA)?
Two-factor authentication adds extra security measures to protect sensitive data stored on HubSpot. During registration, you can opt to receive a text message with a code whenever you try logging in from an unrecognized device. This prevents unauthorized individuals from accessing your details. To activate 2FA, visit Security & Login Protection. On the same screen, you can toggle between three types of login protection methods: Text Message Only, Authenticator App, and Password + Secret Question. Make sure to check whichever suits your preferences.
11. How do I lock down restricted content on HubSpot?
Content filtering ensures that employees cannot share personal data outside company boundaries. While setting up content filters, you can choose which files are allowed to pass through. To do that, head over to Content Filters. First, select Block File Uploads. Then, pick the appropriate radio button beside Files to block. Lastly, specify the blocked file extensions and descriptions.
12. How do I prevent editing of restricted content on HubSpot?
Like the previous tip, you can restrict editors from modifying banned content by disabling editing permissions. To achieve that, go to Content Filter Rules and disable Editing Rule. Also, remember to revoke write permission for administrators.
13. How do I reset password on HubSpot?
After losing control of your account, you can request a password reset procedure. Head over to Reset Passwords. Enter your username and click Request Password Reset. Within 24 hours, you'll receive a secure email with further instructions. Keep in mind that since HubSpot uses bcrypt hashing algorithm, you must provide a strong master password to start the process.
14. How do I transfer ownership of a list on HubSpot?
Ownership refers to giving responsibility for running a specific list to someone else. To do that, go to Ownership Transferring. Log in to your HubSpot administrator account and select Move List. Pick the list that you want to move. Then, fill out required details and click Confirm.
15. How do I send bulk emails on HubSpot?
Useful for sending automated messages to large clientele, HubSpot offers a Batch Emails function. To begin, sign in to your HubSpot account. On the left sidebar, expand Messages section and select Send Bulk Emails. As soon as you finish typing recipient email addresses, tap the green arrow icon on the top bar. Afterwards, continue entering subject lines and contents for each batch of recipients. At last, click OK and wait for confirmation.
16. How do I clean up inactive leads on HubSpot?
Leads that haven't logged into HubSpot in 3 months are marked as inactive. And unfortunately, there isn't much you can do to resolve this issue unless you hire sales representatives. But in case you prefer to deal with leads manually, you can mark inactive leads as Active. To do that, select Leads in Dashboard and scroll down to the bottom pane. Find the dropdown box titled Active Status and select True.
17. How do I delete leads on HubSpot?
Deleting leads is easy as long as you don't delete all of them simultaneously. Just highlight the list of leads you want to erase and click Delete Selected Lead Group. This action deletes the entire lead group instead of marking single leads as deleted individually.
18. How do I search for leads on HubSpot?
Searching for leads works similar to searching for documents. Start typing in keywords and phrases associated with potential prospects. You can also filter results by status. To do that, head over to Search Leads. Press Advanced Filtering and choose Status = Open.
If there’s one thing that annoys me about working with lists in HubSpot (or any other CRM), it's when people don't follow rules or etiquette. It seems like every time I log into my account, someone new has joined my team and they've either forgotten how to behave properly on their own list or have gotten confused with user permissions for multiple users.
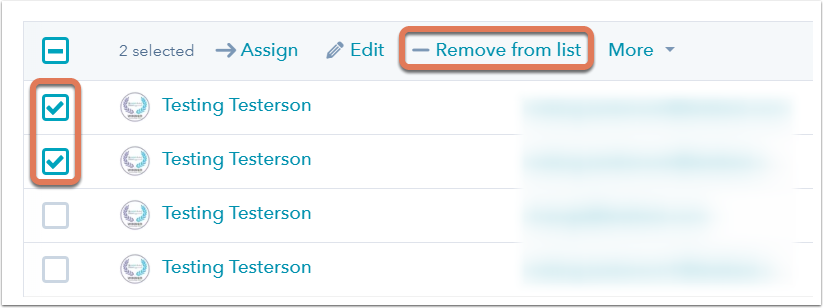
Let's take just one of those examples - removing yourself as a member of your own list. While it is not possible to manually remove a contact from an active list, you can use the following workaround to make sure that only people who should be able to see your profile can actually view it. The best way to handle these situations is by putting these "rules" into place before anyone joins your team so you will always know what to expect. Here are some tips on how to keep your lists organized and professional-looking.
No! You cannot simply go through each item in a list and delete them individually. This would result in broken links throughout the system which could potentially affect important data such as passwords. Instead, here are two options for deleting individuals without breaking anything else.
Option 1: Use Mail Merge
Mail merge refers to using information pulled from your database to create personalized emails to send out to specific groups of people. In this case, we'll pull our Contacts' names and add them to a group that only certain members may access.
This method works well if you want to include more than just Contact Name and Email. If that isn't enough, however, another option might be needed for larger lists.
Option 2: Bulk Delete
Bulk deletes refer to pulling large amounts of records at once instead of going row-by-row. These are perfect for cases where you need to quickly clear out hundreds or even thousands of entries. To perform a bulk delete, click on Manage Lists in your Settings menu under System Preferences. Once there, select your desired List and then choose Edit Data Source. Choose Create New Grouping Field and name it whatever you'd like. Click OK to get started. Now, head back over to the same screen but change Select All Records to Where Exists. Then, hit Save & Continue. From here, you can review fields you created earlier and select whether you wish to display items based upon values within the selected field(s). Finally, hit Submit Selection and wait while HubSpot processes everything. When done, you'll find a confirmation message stating Successfully processed X number of rows. That's it! Your entire list will now be cleared out.
Once again, the process differs slightly depending on the size of your dataset. For smaller datasets (less than 500), this method will suffice. However, if you're dealing with larger numbers of contacts, the second method might prove quicker.
To recap, here are the steps required to complete a bulk delete via CSV file:
Click on Manage Lists in your settings menu under System Preferences.
Select your desired List and choose Edit Data Source.
Choose Create New Grouping Field and name it whatever you'd like.
Hit save & continue.
Review existing grouping fields and select whether you wish to show items based on value of newly added field. Hit submit selection and wait until hubspot processes everything.
When finished, you'll receive a notification saying successfuly processed x number of rows.
Now, if you ever run across a situation where you need to completely wipe away an individual record because of misbehavior, please remember that doing so will break links elsewhere in your system. It also means that you won't be able to edit things like phone numbers or addresses associated with that person anymore. A better alternative would be to reach out to customer support directly and request removal. They can help walk you through getting rid of that particular entry.
In addition, HubSpot offers both manual and automated methods for cleaning up your list. Let's talk about how to do that next.

HubSpot provides several ways to automate the cleanup of inactive accounts and duplicate contacts. Whether you're looking to consolidate your contacts into fewer lists, or you're trying to avoid spamming people with unwanted mailings, HubSpot makes it easy to manage your lists effectively.
Here are three quick suggestions on keeping your lists neat and tidy.
1) Consolidate Duplicate Entries Into Fewer Lists
Duplicates occur frequently after adding new employees to your list. Sometimes, duplicates appear due to typos made during signup, while others reflect different spellings of the same address. Either way, they cause confusion and clutter.
You can easily resolve this issue by consolidating similar entries onto fewer lists. On your dashboard home page, scroll down to the bottom right corner and hover over Customer Support. There, look for Customers tab and expand its dropdown. Under Subscribers, uncheck Duplicate User Names and enter unique labels for Accounts and Addresses. Afterward, check off Show Filters and set up filters accordingly. By default, these will automatically hide duplicate contacts on your Dashboard.
2) Clean Up Unused Lists
Do you have unused lists cluttering up your dashboard? Perhaps you had intended to share them with colleagues but never did. Or maybe you used them in previous versions of HubSpot but didn't realize it was no longer supported. Whatever the reason, you can clean these up too.
On your Homepage, navigate to My Account " View All " Customize Menu Items. Scroll down to Find More Features and type in "clean". Look for Remove Selected Lists and tap the green plus icon underneath. Confirm that you no longer intend to use the feature by tapping the red cross beside it.
3) Automatically Filter Emails Based Upon Who Recipients Are Not Sent To
Have you ever received an email from a coworker whose details were hidden behind a link that said something along the lines of "Are you sure you wouldn't rather NOT hear from this sender?" Unfortunately, the recipient doesn't recognize your colleague's full email address and assumes you must have accidentally clicked on the wrong link.
Avoid this scenario by setting up automatic filter rules for incoming messages. Go to Admin Panel " Administration " Rules Management. Tap +Add Rule and fill out the form according to below guidelines. Note that you can customize the rule to suit your needs.
Actions allow you to specify various activities performed by the recipient. Options include viewing the subscriber's profile, sending a reply, creating notes, etc.
For example, let's say you would like to block subscribers from making comments on blog posts. Simply enable Block Comment Actions and input Comments. Next, toggle Allow Preview Content Actions, disable Send Message Actions, and leave Disable Follow Action unchecked. Lastly, configure conditions for whether or not the action should happen. Set Conditions to equal true.
Afterwards, hit Apply Changes and enjoy peace of mind knowing that you've protected your readers against harassment.
Emails are often sent to customers, partners, or prospects with attachments containing files or documents. In many cases, these end up being lost forever or become part of company spam folders.
Luckily, HubSpot allows you to track email tracking statistics, allowing you to monitor delivery rates and determine bounce rates. Additionally, you can prevent junk mail from appearing in your main inbox and improve overall deliverability by configuring whitelisting restrictions.
First, open Outlook Web App on your desktop browser. Head to File " Info " Tracking Statistics. Checkmark Enable Tracking and provide a Username. Afterwards, click Create Profile. Once completed, return to Tracking Statistics and verify that your Active Users count matches with actual recipients.
Next, switch to Gmail and visit your webmail client. Navigate to Gear Icon " General Tab " Whitelist Manager. Enter the username provided above and mark Yes next to Include Domain.
From here, you can ensure that only legitimate clients are included in future deliveries. Furthermore, you can set up a whitelist blacklist to restrict unwanted domains from showing up in your inbox. Just be aware that blacklisted IP ranges aren't blocked indefinitely. Rather, they remain enabled until you turn whitelisting off.
HubSpot does offer additional tools designed to assist you in maintaining order among your lists. One useful tool is called AutoCleanUp. With AutoCleanUp, you can identify and organize contacts that haven't been touched in months. This helps free up space on your server and streamline your workflow.
Simply navigate to Admin Panel " Marketing Tools " AutoCleanUp and select Start Scanning. Wait for the scan to finish, then review results and decide whether or not to proceed. Keep in mind that scanning older data can take upwards of 24 hours. As long as you don't plan to interact with these profiles anytime soon, it shouldn't pose much problem.
However, it's worth mentioning that AutoCleanUp is only available for Enterprise plans.
Don't forget to try out these helpful features on your own lists first, though. Otherwise, you may end up missing out on valuable opportunities to optimize performance and efficiency.
It's easy enough to create lists of people and topics within your marketing automation tool. But what if there are certain people or topics that you want to keep out of one particular campaign but still send them emails about other things? Or maybe you'd like to build up your email database by including these contacts into different campaigns over time. These situations may arise when using HubSpot for business purposes. Here we'll show how to accomplish this through some simple tricks, as well as explain why it isn't possible to just "remove" a person from their own list (for now).
HubSpot has made it difficult to delete someone from a list they've created themselves because most users tend to think that deleting means removing all future communications between those two parties. This is untrue. If you're looking to completely cut off communication between someone who belongs to a specific list you have created and yourself, here are three ways to go about doing so while maintaining any existing relationships you currently have with that individual user.
The easiest way to get rid of someone from a list without having them receive more emails from you would be to simply stop sending them emails altogether. However, since HubSpot makes it very easy to set up automated messages sent to multiple individuals after each step taken during the signup process, this option will likely not achieve exactly what you desire. You could instead consider setting up a new profile specifically for that user and moving them over to that account instead. Another option is to block that user via HubSpot's built-in tools. Either method should ensure that they won't continue receiving updates to whatever newsletters you have sent out to them thus far.
Another alternative might involve creating another list entirely which contains only those individuals whom you wish to remain excluded from. Then, once you know who these people are, take advantage of HubSpot's Email Builder feature. By adding a recipient field to a message template, you can then filter out every single member of that list by entering their name(s) into said text box. For example, let's say you wanted to make sure that everyone on your team was removed from your Marketing Automation List except for one select few. To do this, you'd add a recipient field to your welcome email and enter something like “Team Members” in place of the default placeholder value. Once you click Create Message, HubSpot will automatically populate the rest of the fields with members of your chosen Team Member list. Now you can craft your desired message, save it as a draft, and schedule it to go out later. When you check back in, you'll see that the recipients listed are only the names of your preferred Team Members. They were never actually added to the target list itself, meaning they won't ever appear anywhere else in your system. The same technique works for excluding anyone else who happens to be on your Contact Us list at the moment.
If you don't feel comfortable blocking users who belong to lists you have yet to establish, you can also try making them inactive first. Inactive accounts are similar to blocked accounts, where they cannot view any content until reactivation, but they aren't prevented from interacting with others. So, if you decide to follow the above steps, you shouldn't encounter many problems. Just remember that inactive users won't be able to access anything unless you manually activate them.
There's no need to worry if you're wondering whether it's even possible to remove a person from their own list in HubSpot. As long as you haven't marked them as Spam, deleted their account, or otherwise deactivated them, they'll always maintain access to everything on that list. And yes, technically speaking, they'll also continue to receive emails about lists they didn't opt into. It's worth noting that HubSpot does allow you to change the status of your entire account if needed. Simply head over to your Settings page, scroll down under General Manage Accounts, and choose Edit Account. From there, you can toggle options such as Deactivate and Delete Account. Note that both of these actions are irreversible, so you should really think carefully before hitting either button.
However, if you've already done this, you can still attempt to prevent people from accessing information on lists they weren't originally apart of by editing their permissions. Head over to Lists settings, expand the dropdown menu next to Active Users, and click View All Users. Next, find the user whose permission you wish to adjust and click Change Permissions. On the resulting screen, switch the Status column from Published to Private and hit Save Changes. That user won't be able to interact with any content whatsoever until you change the aforementioned status back to Public.
Lastly, if you happen to have lots of folks on your list who aren't supposed to see certain pieces of data but you'd rather give them access to other parts of your platform, you can do this easily by filtering out unwanted contacts. First, open up any given list and navigate to its settings area. Click Customize Data Fields. Choose Content Type, followed by Filter Exclusions. Under Filters, type in the name of the user you wish to hide. Hit Apply filters and you're good to go!
If you import new contacts into your system regularly, you may occasionally come across the situation described earlier regarding contacts belonging to several lists. Fortunately, thanks to HubSpot's ability to export bulk records, you can delete these contacts individually outside of your regular CRM app.
To begin exporting your contacts, navigate to Contacts " Export Bulk Records. Select the appropriate date range and click Download CSV file. Make note of the email address associated with each record. Open the spreadsheet in question and sort by Last Name. Find the correct entry corresponding to the addresses you noted earlier. Right-click on that row and select Copy Row. Go ahead and paste it somewhere safe. We recommend pasting it inside a Notepad window. Finally, right-click again and select Paste Special. Switch to Values and pick OK. Your exported contacts are now ready for deletion.
Now that you've got your handy Excel sheet filled with hundreds of potential spam targets, it's time to turn to HubSpot's main application. Launch the desktop version if necessary and browse to Tools " Bulk Actions. Scroll down until you reach Import/Export, then click Browse Imported Contacts. Pick an applicable action, select the CSV file containing your newly copied rows, and click Submit. After completion, you should see a confirmation pop-up indicating that all selected contacts were successfully updated.
Finally, open up your CRM app and look for People section located along the top navigation bar. Expand that section and locate the relevant tab labeled My Connections. Look for entries ending with -1 or -2. Hover over them and click Remove Selected. Confirm that removal and wait for HubSpot to perform the task. Repeat this procedure for each row you have saved in your Excel spreadsheet. Be aware that not all contacts will fit onto one update due to differences among various platforms' contact profiles. Sometimes, HubSpot will ask you to confirm the operation beforehand. Once you've gone through the process, you should notice that none of your previously imported contacts exist anymore.
For those times when the manual removal methods discussed earlier fail, you can employ HubSpot's advanced search features to help automate the process. Let's assume that you have a large number of clients in your company who are part of the Customer Service list. Instead of going through the tedious steps outlined above, you can write a custom Workflow rule that allows you to mark a group of contacts as Unsubscribe. Once written, you can assign this workflow to whoever needs to carry it out.
First, start by navigating to Home " Rules. At the bottom of the panel, click + New Rule, giving it a descriptive title. Ensure that Enable Advanced Search is checked. Next, scroll down to the Conditions category and choose Has Attribute. Enter the attribute label matching your criteria, i.e. Client_Type=Customer. A short description of what you're trying to match against will help narrow down results further when choosing attributes in subsequent sections. Lastly, choose the Field Value operator equals and input Customer. Do not include spaces in the Value box. Doing so will cause errors.
From there, move on to selecting the Action Category and clicking Assign Multiple Rows. Drag your cursor around to highlight the ones you wish to apply the rule to, then press OK. Wait for HubSpot to run the workflow, and repeat for each client you wish to unsubscribe. While it may seem counterintuitive to leave these clients in your system, keeping their details stored away serves to protect your privacy and helps avoid unnecessary clutter. Plus, you can always revisit the rules later and modify them accordingly. Should you decide to pull the plug on a customer relationship altogether, you can always disable the rule instead.
 Send emails at scale

