 LIMITED SPOTS
All plans are 30% OFF for the first month! with the code WELCOME303
LIMITED SPOTS
All plans are 30% OFF for the first month! with the code WELCOME303

LIMITED SPOTS
All plans are 30% OFF for the first month! with the code WELCOME303

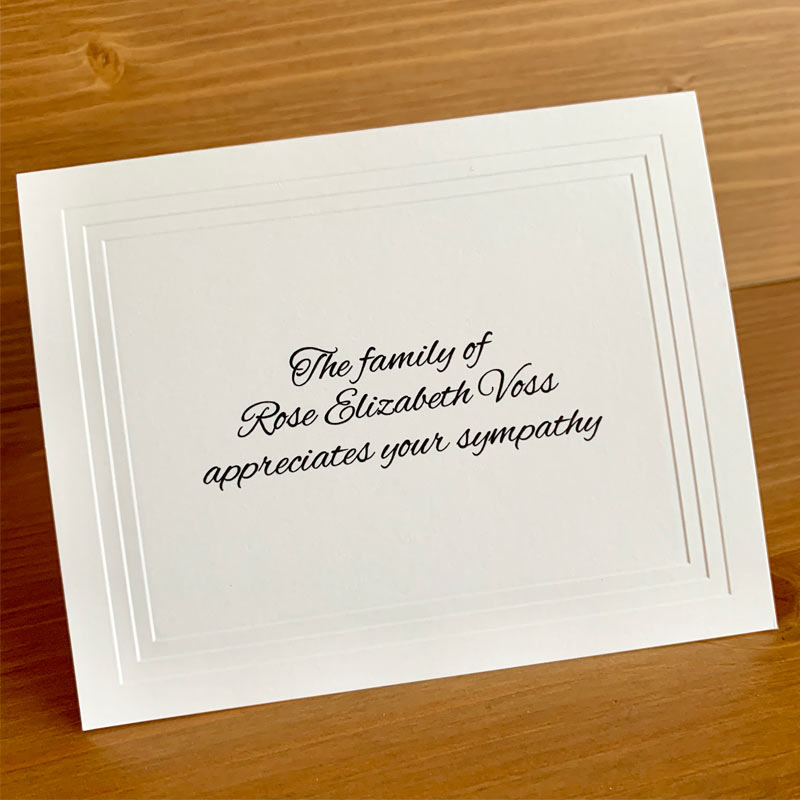
When mailing something, especially if you're sending a package overseas, there are many things that can go wrong with your delivery attempt. The most common problem is misspelling someone's name or misplacing their street number. But when this happens, you usually get another chance at delivering the item -- and not everyone has such luck. If you sent a gift abroad for example, chances are good that it won't end up in the right hands by accident. That's why some people opt out of using post offices altogether and use private couriers instead. For less time-sensitive items, like letters and cards, taking extra care over labeling addresses may save you money on postage and ensure that your message gets delivered properly.
The first step in ensuring proper addressing is choosing the best location for writing the address. This area isn't just determined by aesthetics, but also practicality. While we often think that the top left corner makes sense because it's easy to read, sometimes it really doesn't make sense at all. In fact, it might actually cause more problems than solving them. So what about all those corners that seem totally confusing? And do they always need to be labeled? Keep reading to find out.
Mail carriers have been known to cross out numbers so that no one accidentally takes the wrong route. However, although this method works well enough in urban areas, it becomes impractical as soon as you leave behind the city limits. It would take too much space to list every single residential neighborhood individually -- which means you'd probably never send anything that way anyway. Luckily, postal routes aren't quite as complicated as they used to be. Nowadays, people simply ask directions. They don't have to memorize long lists of names and streets. All they need to know is whether the house is red brick two doors past the bus stop or white stucco three blocks south. Once they've got that information, they'll remember exactly where to turn without any help from us.

There are several different ways to correctly label the address on an envelope, including both U.S. Postal Service (USPS) and FedEx standards. Both sets require that you include specific formatting in order to accurately direct packages to their destinations. Although the specifics differ slightly between each company, here's a breakdown of the basic rules for each standard. First off, let's talk about USPS requirements.
U.S. Postal Services requires four pieces of personal data per address:
Street Number
Street Name
Apartment/Suite Number
City
If you live in a townhouse, apartment building or complex, you only need to provide the suite number. Suite refers to the entire floor within the same structure. A person living alone in a small studio must supply a separate street number, while a group of roommates who share a larger unit must provide both their individual suite numbers. Most importantly, however, you cannot skip either set of numbers. When entering the final piece of information, zip code, you must follow the numbering system according to the last segment of the full address before the "zip" designation was added.
For instance, if your full address were 515 W. Elm Street, Apartment 1, then your ZIP code would be 09801. Your apartment number, therefore, would be located in the second block of five digits after the full address begins. Since 9800 is greater than 9810, you wouldn't enter the latter digit into the computer. However, if your address were 1555 N. Main St., Apartment 2A, then the ZIP code would be 01202 since 10020 comes later alphabetically. Therefore, the second apartment number would fall under the 10th block of numerical digits. Of course, this rule applies to both ZIP codes and apartment numbers, so you shouldn't ever run into an issue unless you move somewhere completely new. As far as localities go, you can lump multiple cities together if necessary. Let's say that you had lived in New York City, Manhattan, for years until moving to Los Angeles, California. Then you decided to continue using your old PO Box. Under USPS guidelines, the zip code for LA differs from NYC, so you must add the appropriate locality. Thus, the zip code for your box would change from 7454 to 90033.
FedEx guidelines are similar except for one major difference: There is no requirement to display a complete street address. Instead, FedEx mandates that you place the sender's return shipping address directly beneath the main text. Because of this, you must include the apartment number whenever possible. Just keep in mind that apartment numbers can vary widely depending upon region. Some places may omit apartments entirely, opting to show only suites or floors. Even though you don't technically have to include the exact street name, it does make life easier if you recognize the neighborhood immediately.
So now that you understand how to put the address on correctly, next we'll look at where to put everything else.
While the above examples focus primarily on domestic deliveries, international shipments will need additional precautions. Read How International Shipping Works for details.
Do you want to increase your odds of having your letter arrive unopened? The answer is surprisingly yes. According to research conducted by the National Association of Unsolicited Package Dealers, approximately 70 percent of all incoming correspondence fails to reach its recipients due to poor labeling practices. With that said, it pays to pay attention to detail when addressing labels. Take note of the following points:
Write the person's full name rather than abbreviating it. Also, try not to capitalize his or her title. Capitalizing implies importance.
Avoid making assumptions regarding gender. Avoid phrases like "Dear Sir," "To whom it may concern." These tend to imply male dominance. Furthermore, avoid assuming that men are the only ones receiving mail. Women receive plenty as well.
Use clear handwriting. Don't print in blue ink, as black tends to fade easily.
Include the words "return receipt requested." This indicates that the receiver wants proof that the package has arrived safely. Without requesting a receipt, the recipient may assume that you lost it during shipment.
Address envelopes carefully. Do not fold the flap inward. Folded flaps allow air to seep through, slowing down the transit time.
Make sure to seal your envelopes efficiently. Use double seals wherever possible.
Don't forget to apply stamps!
Many companies offer specialized services for delivering important documents via courier. Learn more about them in our article What Are Courier Companies?
Some people believe that you can write the address anywhere on the outside of the envelope. After all, the recipient knows precisely where he lives. Others argue that doing so renders instructions useless. Regardless of your stance, the general consensus seems to agree that the best locations for marking the address are near the top and bottom of the envelope. Why? One reason is simple economy. By placing the address closer to the opening, you reduce the amount of wasted paper inside. The other option, putting the address at the very tip of the envelope, reduces the risk of smearing the glue around inside.
But what about corners? Does it still make sense to mark the address at the edge? Again, opinions differ. Many experts suggest leaving the square blank on the front side. Doing so allows for maximum visibility. Other sources recommend drawing a line along the length of the envelope to indicate the direction for the address. Still others advise against marking the corners at all. Their reasoning centers on the possibility of the contents spilling onto the envelope itself once opened. Since the envelope is already folded in half, there's little worry about spillage.
As mentioned earlier, you can mix it up a bit when deciding where to place the markings. Rather than sticking strictly to vertical lines, consider sloping the edges upward toward the corners. This helps guide the eye away from the actual address. Finally, some folks advocate folding the back panel of the envelope over so that the address is invisible. Not only does this cut down on waste paper, but it eliminates the risk of accidental contact with wet surfaces.
Another thing worth noting is that the United States Post Office recommends avoiding fancy designs. Plain shapes work better with the eyes than intricate patterns.
Yes and No. Like the previous question, opinions differ greatly on this topic. Some people insist that the address needs to appear in the center to prevent confusion. Others claim that the majority of receivers open letters randomly. Either way, it appears that placement depends largely on preference.
Just remember that the biggest danger lies in the potential for spills. Whether you choose to inscribe the address in the center or elsewhere, you should strive to minimize the likelihood of liquid coming into contact with the envelope surface. Another consideration is size. Large addresses stick out further than smaller ones. Perhaps counterintuitively, large addresses pose less of a hazard for spills, so they're safer overall.
You've got the right postage, all the stamps and the correct amount have been pre-printed onto envelopes that are meant for mailing cards and letters. But there's one thing missing -- where is the "From" address supposed to go when sending out a piece of correspondence? The answer depends on who you're writing to. If it's someone else or just yourself, follow this handy guide to make sure you get things straight.
If you've ever received a package addressed with only a post office box number (which often occurs if you receive packages via UPS) then chances are good that the sender was trying not to give away their location. A simple way to find out whether you were being discreet enough is by looking at the address itself. You can also use online services like PostMates' free Postal Address Lookup tool which allows users to search for postal codes across Canada, Mexico, New Zealand, Australia, Japan and China.
However, sometimes people simply get confused about where they need to write "To:" When it comes to addressing envelopes, it seems no matter what country we live in, everyone has different ideas. In some countries, including America, the standard practice is to place the address squarely in the center of the top third of the front flap while others prefer placing it somewhere else entirely. It may seem silly but the differences actually come down to something called the international convention for uniform spelling of English names. This rule dictates certain places where each name should appear. While it doesn't apply everywhere, it does help ensure consistency among various cultures.
So before you start scrambling around your desk, take note of our instructions so you don't end up accidentally directing your message elsewhere. We'll explain why "return receipt" might require more space than "postage," and why "to" might mean different things depending on what you're mailing.
In addition to the rules below, keep in mind that the United States Postal Service recommends that you include as much information as possible on your outgoing mail because they have to sort through hundreds of thousands of pieces of junk mail every day. So always try to fill in any available spaces on your envelope. Just remember to leave room for a stamp!
Yes! However, since most companies today ask customers to sign for their packages using electronic signatures, they usually won't care what part of the envelope contains the return address. Return receipts vary widely between countries because of differing laws regarding electronic signatures. For example, if you send e-mail from a U.S.-based account, the signature line typically appears beneath the subject field. However, other nations have varying policies. Some allow return addresses to be placed anywhere on the outside of the envelope, while others insist that the return address must appear inside the envelope.
The best approach is to research local customs first. Most major cities now have websites that provide updated guidelines for proper envelope labeling. Check them out to see what you should pay attention to. Or call your neighborhood post office to see what policy to expect there. They may even suggest a good book store to buy a copy of International Mail Etiquette Guide [sources: Kelleher et al., Hirschler].
For those interested in learning more about international etiquette, here's another tip: Don't fold the bottom corner of your envelope back over. Doing so is considered very rude. Simply tuck the edge under the seal instead. And yes, that includes the return portion.
When returning items such as books, magazines, CDs and DVDs, avoid stuffing unwanted material into the envelope. Instead, file it in a separate folder without sealing it. Then open the envelope carefully, remove the contents and discard the rest.
A lot of us learned early on in school that putting your street address on the envelope means that the letter goes directly to the trash. That's true for many countries, especially those in Europe where garbage workers look for personal correspondence marked with labels indicating the addressee lives abroad. Also, for anyone living in India, Pakistan, Bangladesh, Sri Lanka or Nepal, anything mailed to North America or Western Europe would likely end up in the bin after a quick glance.
But that isn't necessarily the case for all parts of Asia. Letters sent to Thailand, Malaysia and Indonesia will reach their destinations intact. Even though regulations differ slightly throughout the world, the general consensus is that addresses should be located near the upper left hand side of the envelope. Why? Because that's where most postal workers begin sorting incoming mail.
This method works well for both directions. On the receiving end, it makes sense to know exactly where a letter came from. Of course, you want to know where your own stuff ends up too. After all, if you send a letter to the wrong person, you'd probably feel pretty stupid.
On paper, this system looks fine until you realize that most computer screens display text starting in the lower left hand corner. As mentioned earlier, that's where most postal employees begin sorting incoming mail. Therefore, even though the majority of computers worldwide still default to showing addresses starting in the upper left, most of us tend to ignore that little bit of info and focus on the important details.
It turns out that whether or not you choose to centralize your address on an envelope is largely determined by whether or not you plan to track the results of your shipment. For instance, in the United States, most businesses consider it bad form for a customer service representative to read an email that arrives in the middle section of an envelope. To prevent potential embarrassment, they prefer to either clip off the return address or cover it with tape.
In contrast, however, many individuals don't share that concern. Since they aren't concerned with tracking their returns, they opt to stick everything together. That said, many folks believe that leaving the address exposed gives a better idea of where the item came from. After all, if you mail something back to a friend overseas, wouldn't you rather let him know that his gift came from you by seeing the return address?
Most experts agree that regardless of how you decide to handle it, sticking the return address on the exterior of the envelope is acceptable. Whether you locate it above or below the main body of the envelope, the primary purpose of the address is to inform the recipient that he/she didn't misplace your missive. Once that's done, the extra step of having to pull apart several layers of paper becomes redundant.
That said, if you happen to move to another city or state, you may want to change your address anyway. Otherwise, you run the risk of confusing future readers -- particularly postal workers.
Although the issue of where to place addresses on envelopes varies greatly according to locale, there is one universal law that applies to most areas: Never cross-fold the corners of an envelope. No exceptions. Folded corners indicate that the envelope wasn't properly sealed. Not only is it unsanitary, it's illegal in many states.
And although we touched upon it briefly earlier, it bears mentioning again: never fold the edges of the envelope underneath the postage. Again, it indicates sloppy workmanship. Another common mistake involves folding the entire length of the envelope along crease lines created during printing. Although technically OK, it creates problems later on when opening the letter. Without unfolding the sides, it's difficult to extract the letter once it reaches its final destination.
When it comes time for us all to send letters and cards through the U.S. Postal Service, there are some things that must be done correctly to ensure our mail reaches its target audience without delay. One such thing is labeling our envelopes with information about where they came from. If this information isn't accurate, then our letters may not get delivered as quickly as possible. And just like when crossing the street, if you don't know what's coming toward you, you shouldn't assume you can safely ignore it -- especially since you're probably holding something important!
So, let's take a look at how to use labels properly so that your mail gets sent out undelayed. We'll start by taking a look at which areas need to have correct data entered into them. Then, we'll discuss proper entry methods and placement of various items on an envelope. Afterward, we'll see why having everything labeled accurately is crucial to speedy delivery. Read on to find out more.
If you've ever wondered whether you should put "From" first or last on your envelopes, wonder no longer! The answer seems obvious: Put the city name (and possibly state) first, followed by the ZIP code. However, many people aren't aware that different states spell their own names differently. As a result, putting the zip code before the city might lead to confusion between the two. So, if you're mailing to someone in another state, make sure to double-check your information before finalizing. For example, "New York," New York 10001, would follow "10013."
Next up, let's talk about where exactly you enter each piece of information onto your envelope.
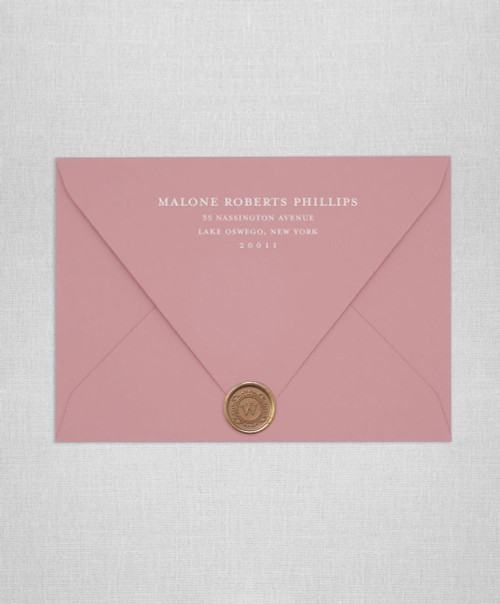
The easiest way to figure out where you should place addresses on an envelope is by looking at actual postcards and letters already sitting inside one. You'll notice that most postal workers begin addressing envelopes near the top left corner. This area contains the following pieces of information :
Your return address - A person's home address is usually located here because it's always placed on the upper right hand side of any correspondence addressed to him/her. To locate your return address, simply open the letter you want to ship back to yourself and check the signature line. It will likely read something similar to Mr. John Smith, Box 12345, Any Town, NY 1234 567 890. Now, compare this to the address itself. In this case, the address has five numbers after the town that represents the year the house was built and four digits representing the number assigned to his specific property within the subdivision. Your return address should also include your full legal name including middle initial, if applicable.
City and State - These are both found together on the same line. Most postal workers choose the bottom portion of the envelope to display this information. When using a business reply envelope, however, only the city needs to be included. While the state does matter when sending a package, businesses often receive packages from customers who live outside of their jurisdiction. Because of this, the state doesn't really apply.
Zip Code - Like the return address, placing this directly below the City and State is best. Again, you should avoid confusing the two if you're mailing to someone else in another state.
Date Stamp - This is typically placed next to the Zip Code. With today's date stamp technology, you don't necessarily have to add the day unless you plan on shipping something overseas.
Now that we've looked at where to insert each item, let's move on to where to actually print those details.
As mentioned earlier, the above guidelines work perfectly well for standard sized envelopes. But what happens when you try to fit too much information onto a smaller size envelope? Well, that depends entirely upon what kind of envelope it is. Some require less space than others while still being able to accommodate every piece of info listed. Since the rules change depending on the type of envelope, let's go over several common types. First up, we'll cover large format envelopes.
Large Format Envelope Guidelines - Address Labels
Small Business Standard Size Envelope - Usually used for outgoing mailings, a small business envelope offers enough room to fit a person's address along with other relevant information. On average, this style of envelope holds three or four sheets of paper, but sometimes offer larger sizes. Once again, the guidelines regarding where to enter information depend on where the address falls on the envelope. Generally speaking, the largest part of the envelope takes priority, meaning the address goes underneath the postage amount. Next, the City and State go under the Post Office box number, followed by the Zip Code. Finally, the Date Stamp goes beneath the Destination Barcode. Of course, this order varies among companies, so check yours carefully to make sure you haven't accidentally reversed the order. Also keep in mind that the barcode on the front of the envelope acts as a sort of temporary address until the contents arrive.
Business Reply Mail Envelope - Much like small business envelopes, these ones contain ample room to hold the sender's address and related information. They differ mainly due to the fact that business reply envelopes come preprinted with the company logo. As a result, the back panel of these envelopes contains mostly the content of the message rather than necessary addresses. Therefore, the entire address appears on the front of the envelope instead.
Transit System Sized Envelope - Transit system envelopes are generally used to transport documents during transit via airplane, bus or train. These envelopes cannot accept additional material once sealed, so the contents appear on the front. Since the address is printed on the front, the recipient can easily identify who mailed it. Unlike regular envelopes, transit systems don't usually allow for extra information to go on the exterior flap, making the Back Panel useless for advertising purposes.
Other Types of Large Envelopes - Other manufacturers produce special envelops designed specifically for certain industries. Don't worry if you don't recognize the terminology -- chances are, whoever receives your letter won't either.
In addition to these general guidelines, let's now review where to enter information for individual pieces of mail like checks and coupons.
Coupon Insert Guidelines - Where to Write Coupons' Return Address
Check Cover Page - Many banks provide free inserts called Check Covers. Alongside your account number, bank statements and checks, these covers contain useful coupons. Unfortunately, inserting a coupon into a check cover is tricky business. Here's what you need to remember:
First, make sure the check cover is completely blank. Otherwise, the ink will bleed through.
Second, stick the check cover face down on top of a clean sheet of copy paper. Make sure the edge containing the hole for the checkbook ribbon matches the edges of the checkcover.
Third, cut around the check cover shape using scissors. Use a pencil to mark the outline of the check cover on the underside of the paper. Try to leave about 1 inch (2.5 cm) of overlap around the perimeter to prevent fraying. Cut away excess paper using scissors.
Fourth, fold the check cover paper in half lengthwise. Place the folded check cover face down on top of the paper with the marked lines facing upward. Tuck the corners of the folded check cover behind the sticky backing on the check cover. Apply tape liberally on the opposite long edge of the check cover. Lift the taped half of the check cover and slowly peel off the remaining paper. Set aside the torn paper.
Fifth, punch holes evenly spaced apart across the centerline of the check cover. Punch one hole approximately ½ inch (1.25 cm) from the short end and one at the far end. Thread a thin rubber band tightly around the punched holes, securing the ends of the band to themselves. Using a pin, poke 3 equally spaced holes about 2 inches (5 cm) apart running perpendicular to the banded holes. Repeat the procedure along the opposite long edge of the check cover. Fold the check cover in half lengthwise to form a crease running parallel to the shorter holes. Unfold the check cover. Run a finger gently down the creased line to separate the overlapping layers. Tape the unfolded check cover firmly in place.
Sixth, run a strip of adhesive glue lightly along the edge of the check cover's interior surface. Lay the check book ribbon against the glued section and press it flat. Wait 30 seconds and remove the ribbon.
 Send emails at scale

