 LIMITED SPOTS
All plans are 30% OFF for the first month! with the code WELCOME303
LIMITED SPOTS
All plans are 30% OFF for the first month! with the code WELCOME303

LIMITED SPOTS
All plans are 30% OFF for the first month! with the code WELCOME303

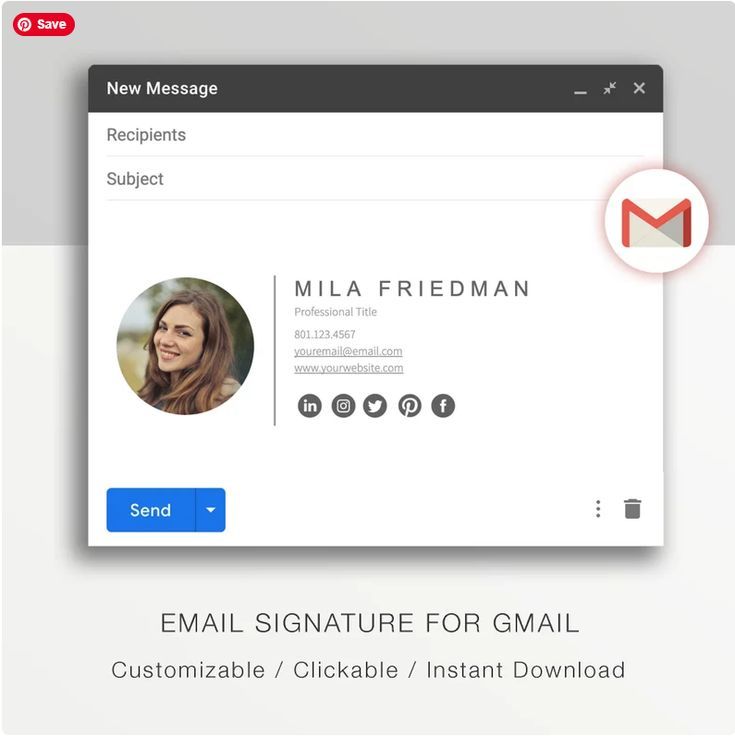
Gmail is the most popular web-based e-mail service on the Internet today. It has become so much more than just a way of sending messages from one person to another -- now millions use Google Calendar, Drive storage space and other services offered by their company. People also keep track of all these things with simple Gmail accounts. Although Gmail's signature editor doesn't let you add actual HTML code, you can still put together a pretty cool signature using an online tool that helps simplify this process for you.
In this article, we'll explain how to set up your own customized HTML signatures with ease. You will learn about two different ways to accomplish this task, both without having to know anything about coding. If you want to go beyond what this guide offers, you may find additional information at HowToAddSignaturetoGoogleMailin5MinutesandTheBestOnlineToolsForAddingAnHTMLSignatureIntoYourEmails.
First off, there are several reasons why you might choose not to input HTML directly into Gmail. For example, if you don't like signing emails as "you" but rather some corporate name such as "Corporate Name," then adding HTML could be problematic because it wouldn't make any sense (unless you were to manually type out each letter). Also, if you work with someone who uses Outlook instead of Gmail, they may prefer you to sign all your outgoing mail with something besides HTML.
On top of those issues, many people would argue that putting HTML into your Gmail signature isn't very professional looking. The truth is that you can actually get away with doing this if you take care to craft your signature properly. In fact, anyone can look good with an HTML signature attached. And when you consider that creating HTML is really easy once you understand the basics, you realize why it's worth taking time to customize them.
We've got everything you need to know about setting up an awesome custom HTML signature below. First, however, let us discuss whether you should even bother adding HTML to your signature.
There are three basic elements involved in building a great HTML signature: a title, link(s) and image(s). A title tells others what your message is about while links lead readers down to deeper content within the body of the email. Images often convey emotions or provide visual appeal. Once you combine these elements, you end up with a truly unique email signature.
You won't see much success if you simply copy and paste HTML into Gmail to try to insert images. However, if you follow our instructions carefully, you shouldn't run across any problems. Here's a quick tutorial that shows you how to format text and images nicely inside Gmail. We recommend reading through it before continuing further.
Now that you have a handle on formatting, here's a step-by-step breakdown of making a well-designed HTML signature. Start by opening your favorite browser and navigate to MailMeLater, which we used previously. Click Create New Account on the upper right side of the screen. On the next page, scroll down and click Get Started Now. Then select Signatures & Identities, followed by Add Signature. Finally, enter your preferred username and password, along with your first and last names.
After you log into MailMeLater, you'll receive an invitation to complete your profile. Go ahead and start filling in the necessary details. When the form asks for your education level, pick High School Graduate. Next, fill in your current job position. Enter your desired career field, and write in the box labeled Your Current Employer. Afterward, hit Save Profile.
If you plan to stick around long enough to earn money via AdSense revenue sharing programs, you'll probably want to check the boxes marked Yes for Interested in earning $$$$ per month and Yes for interested in joining the Affiliate Program. Don't worry too much about selecting specific interests at this point. Just press Continue after every section.
Once you reach the final part of the wizard, you will see the following window. Select Customize Signature and continue. At this stage, you can either opt to upload your existing.psd file or drag-and-drop it from your desktop computer. Hit Upload File, browse to the location of your choice, and wait for the file to appear in the pop-up window.
Next, head over to Edit Signature. From here, delete the default header and footer fields found under Header and Footer respectively. Instead, replace them with your chosen titles. There's only one title needed, so feel free to include multiple lines underneath it. To place new ones, just highlight the line you wish to move and mouse over anywhere else on the same row.
Finally, drag-and-drop the items you'd like to display on either side of your email address. These options typically consist of a photo, plus icons containing words such as Facebook, Twitter, YouTube, etc. But you can experiment with whatever suits your liking. Make sure you leave room between them and the rest of the columns.
That's it! You've successfully created a brandable, elegant HTML signature. Of course, you can always tweak things later to suit your needs better. That said, this method works perfectly fine for many users. Feel free to play around until you come up with something suitable.
Before you get excited about seeing HTML show up when you send an email, remember that it's not possible yet. Unfortunately, Gmail's signature feature does not support inline HTML code. So unfortunately, you cannot embed HTML directly into your Gmail account as you can with Hotmail.
However, if you decide to proceed anyway, read on for advice on how to best design your signature.
When designing your HTML signature, think about what kind of content you want to share with recipients. Some ideas include links to useful resources, contact information, personal statements, quotes, jokes, inspirational thoughts, etc. With this in mind, you should organize your signature accordingly. Plus, bear in mind that certain sections should stand out more prominently than others. Therefore, ensure that your most important info appears near the top of your document.
Keep in mind that a lot depends upon the length of your signature. Ideally, you should limit it to five lines because longer signatures tend to overwhelm people. As mentioned earlier, you can easily duplicate rows by highlighting them and dragging them left-right. Doing so lets you expand your signature according to its contents.
Also, note that you can adjust margins so that your text fits neatly onto a single line. By adjusting the width of various columns, you can increase or decrease spacing among them.
As far as fonts go, you can apply whatever you please provided it follows the rules outlined above. Generally speaking, serif typefaces are easier to read compared to sans-serif varieties. Additionally, avoid fancy font styles unless absolutely necessary since they distract people from your main points. Try sticking to clean, clear letters.
Lastly, try inserting hyperlinks wherever appropriate. Simply highlight a word or phrase, open the Links menu located on the Insert tab, and tap Link. If you notice a problem with the URL itself, you can fix it by editing it yourself. Just double-click the item you want changed and type in your own destination.

Creating a custom HTML signature couldn't be simpler. All you need is an HTML editor. Many free solutions exist including Microsoft Word Online, Notepad++, BlueGriffon, Opera Web Designer, etc.
Here are some tips that help you produce a quality signature quickly and efficiently. Keep in mind that these suggestions aren't hard-and-fast rules. What matters most is that you learn how to structure your documents effectively to achieve the results you desire.
Start by typing up your entire signature inside a plaintext document. Use boldface for titles, italics for subheadings, and strikethroughs for paragraphs. Afterwards, separate individual entries with horizontal bars. Be careful not to use tabs. They cause compatibility issues with lots of browsers.
It's wise to use short sentences whenever possible. Remember to indent blocks of text appropriately. Indenting allows your reader to scan your signature faster.
Try to make your content flow smoothly from one column to the next. Otherwise, the transition tends to be jarring.
Use tables sparingly. Tables are meant primarily for displaying data in neat grids. Unless you intend to present your signature as a table, refrain from using them.
Be aware that the appearance of the resulting product strongly depends upon your knowledge of CSS. If you lack experience with this language, simply research relevant terms online.
Lastly, remember to save your work frequently. Always back up your files regularly. Since you never know when disaster may strike, take extra precautions.
Yes, you certainly can! Although the procedure varies slightly depending upon which version of Chrome you use, the path remains virtually identical.
First, go to your inbox settings by clicking Gear icon " Settings " General. Scroll down to Show my picture in the Conversation View bubble. Underneath this option, mark the radio button next to Enable Conversational Mode. Lastly, enable the Show me photos toggle switch.
When sending emails from your web-based e-mail account, such as Hotmail, Yahoo! Mail, AOL, etc., the signature at the bottom of the message is typically limited to plain text signatures. However, with recent versions of Google’s popular Web browser client (e.g., Chrome), users can now view their signature by clicking on View " Show Signature box within their inboxes. If they click “Edit” next to this button, then they will be presented with a pop-up window that allows them to type out their signature using normal keyboard characters. They also have the option to upload their own image for use as their signature instead of typing one out manually. The downside here is that these new features are only available if the user has upgraded to the latest version of Google’s browser software.
On the other hand, when you send messages via Microsoft Outlook or Apple OS X‘s built-in Mail application, there is usually already space provided for adding both standard text and custom graphics/signatures. In addition, all three of these applications allow users to change what shows up under their names/email addresses whenever they receive responses back from others. For instance, if someone replies to your original email asking how much money you would like to donate to help rebuild Haiti after last year’s earthquake, you could easily modify your signature so that it says something along the lines of, “I am glad to hear about your desire to volunteer and support our relief efforts in Haiti. Please contact me directly later today with details regarding which specific project(s) you'd like to work on. Thanks again for reaching out. Hope to see you soon!"
The question arises whether or not Gmail provides similar functionality. We checked out this feature ourselves and discovered that while you cannot actually edit the signature field itself, you can create a simple HTML signature outside of Gmail and copy over its contents into the appropriate place once logged into your Gmail account. Although Gmail’s signature editor doesn't let you add actual HTML code, you still have plenty of options depending upon just how experienced you are with coding. Here’s how to go about creating either a basic signature or more complex HTML code for yourself.
First off, make sure you've got a few minutes to spare because this process takes some time. You need to open two different files -- one containing the name of your company and another containing the HTML code for your signature. Then, simply highlight each section of text separately in those respective documents and paste them together inside of a third file called "combined_text." Once done, save this combined document somewhere safe on your computer, preferably in a folder titled, say, "HTML Code," since you'll want to keep track of it down the road. Next, head on over to Gmail’s settings page and select “Signature & Extras.” Click on Edit Signature, choose Upload Image, browse through your hard drive until you find the combined text document you saved earlier, and hit Open [File]. Your signature should automatically appear below the text input area. Now that you have everything uploaded ready to go, it’s finally time to get busy programming your HTML signature.
If you don’t know any HTML but wish to try your hand at building a signature, you may opt to download a free online tool called Wordle. It works great for turning words and phrases into colorful designs. Just enter whatever information you wish to include in your HTML signature, arrange it however you want, and then format it according to the guidelines shown on the site. When you’re happy with your creation, right-click on the word cloud and select Copy Link Address. Go ahead and paste that link address into your combined text file.
Once you’ve pasted in your URL, take note of the line breaks between sections of text. Also, look around the signature and notice anything that looks odd, such as empty spaces, extra white space, missing quotation marks, etc.? These might require further editing before moving forward. To fix mistakes, double-click on any particular block of text. A small menu will pop up displaying several tools you can utilize. Select Format Paragraph, and you’ll see that various formatting options become visible, including bolding, italicizing, indenting, changing font sizes and colors, removing paragraph spacing, and even inserting images. You can also quickly insert links to websites and social media profiles. By highlighting certain portions of text, you can remove unwanted elements completely. After making changes, press Ctrl + S (Windows) or Command + Save (Mac). Finally, close out the editing window and return to your main screen. Scroll down to the end of your newly created signature and replace the default text with yours. That’s it! You can now enjoy having your very own HTML signature for every outgoing email sent from Gmail.
Now that you know how to design your signature, you may wonder why anyone would ever bother uploading a photo or logo rather than doing things the old fashioned way. There are many reasons why people prefer to upload a graphic. First off, many companies who deal with sensitive topics often shy away from putting too much personal information on their business cards or stationary materials. Second, sometimes logos aren't allowed to pass through government security checkpoints due to privacy concerns. Thirdly, in instances when the sender isn't able to access his/her corporate website, being able to attach an image is the best alternative. Lastly, many businesses prefer to limit the number of attachments allowed per email because large files consume valuable bandwidth.
For starters, if you feel comfortable with HTML, you can skip straight ahead to the second part of this article. Otherwise, follow along closely. Before getting started, remember to first check your spelling and grammar. It’s easy to mess up important parts of your signature without noticing it.
To start, open up Notepad (or Text Editor Of Choice) and paste in the following piece of code. Be aware that there are special codes used throughout the script. Most of these involve underscores ("_"), asterisks (*), single quotes ('), double quotes (""), tilde symbols (), parentheses (), hyphens (-), plus (+), and equals (=). Double-check to ensure that all of these signs were properly incorporated into the final result.
Once finished, save the resulting file as.html and upload it onto your server. Don’t forget to update your contacts list with the correct recipient information. Whenever you want to alter your signature, simply repeat steps #1 and #2 above, replacing the existing signature with your updated content. Remember to always test your updates thoroughly before proceeding on to step #3.
Finally, before publishing your new signature, you must verify that it functions correctly. Head over to http://validator.w3.org/, type in your new code, and watch the magic happen. As long as your syntax was correct, you should instantly spot errors. Fix problems found during validation, and continue testing your finalized file. At times, validators may detect minor issues that won’t affect overall performance. Simply ignore these warnings.
WiseStamp is an extremely powerful program that lets users customize their signature fields in ways that rival most desktop clients. One nice thing about WiseStamp is that it comes preloaded on Mac machines running OS X 10.5 Leopard or newer. All you have to do is launch the app, sign up for an account, and log into your account. From there, you can drag and drop blocks of text and graphics into the desired location on the canvas. For example, you can create a customized header image for your signature, put it wherever you want, and then move it underneath your typed signature. Alternatively, you may decide to stick with the same background color for your entire signature. Whatever works best for you, WiseStamp gives you complete control.
WiseStamp allows users with email accounts on the web-based version of Google Apps (formerly known as G Suite) to create signatures that include images, graphics, HTML, links, and more. It works much like Apple's own signature feature for iChat/iMail, which lets you sign off by either adding your name and contact information at the end of every conversation, or by typing in a custom message. The difference being that WiseStamp gives you way more options than just text. You can drag and drop elements from one page onto another, creating unique signatures with ease. If you want even greater control over what goes into your signature, you'll need some basic knowledge of HTML.
The process starts out simple enough. After signing up for WiseStamp, you receive a confirmation via mail containing instructions for how to get started using WiseStamp. Once you log in, you will be greeted by the dashboard. Click "Start" under the My Account tab and follow the directions within there until you reach the Signature Editor screen, then click Edit next to Create Signature. From here, you can choose whether you'd prefer to use your current address for sending messages through Gmail, or if you would rather send them directly from your WiseStamp account. Either choice should work fine -- unless you don't have any other email addresses associated with your Gmail profile. In this case, you must set up two separate profiles. We recommend doing so because it makes managing multiple email clients easier later on. For now though, stick with the default settings. Then simply enter your details and preferences before clicking save changes. As far as the content goes, anything you see above will appear on all future emails sent from your new Gmail profile.
Now that you've got everything squared away, your first task is to actually design something cool. With the help of our handy guide below, you can whip together whatever kind of signature you desire without having to know a thing about programming languages or CSS. Just remember that when designing your own image, you cannot upload files larger than 1MB. So keep those pics small!
If you ever run into problems getting your image to show up after saving it, try restarting your browser. Sometimes browsers cache old versions of pages, causing issues with images. Also make sure you refresh the page once you are done editing your signature.
You may also experience difficulties uploading certain file types. These limitations are due to technical restrictions placed upon the service by its provider. However these rules vary depending on the type of device used to access WiseStamp online.
As mentioned earlier, you can only upload one file at a time -- including photos -- unless you upgrade to premium membership ($4 per month). But if you find yourself needing to edit several documents simultaneously, upgrading could prove beneficial down the road. At $4 per month, the subscription fee isn't too bad considering you can store 100 different drafts at a time with free memberships.
After logging in, head back to your Settings menu. On the bottom right corner of the window, you will notice three icons: Profile, Tools, and Help. Under Settings, scroll down to Find Your Way Around, followed by Security. Scroll further down until you come across Signatures. There you will find four tabs labeled Basic, Customize, Uploads, and Premium. Select whichever suits your needs best. When you open each section, you'll see boxes pop up asking you to customize your signature. Simply fill these out according to your preference. Be mindful of the size guidelines, otherwise images won't load properly.
Another option worth mentioning is WiseStamp's ability to integrate itself seamlessly with Thunderbird. To do this, go to Preferences & Accounts. Go to Advanced Options and check Enable Integration with Thunderbird. Now whenever you compose a new email, the icon in your toolbar will change color to indicate the presence of WiseStamps' built-in editor.
In addition, if you happen to switch operating systems often, consider installing WiseStamp on Dropbox instead. By downloading WiseStamp's mobile app [No Longer Available], you can synchronize your signature between devices. Since both apps connect to the same cloud folder, they automatically update and sync accordingly.
This method requires working knowledge of HTML, but it's a great workaround if you really wanted to. First start by opening Mail's Preferences. Next, select Composing. There you will find an area called Show Image Preview. Toggle it on.
Once inside a new conversation, hit Cmd + N to bring up New Message box. Paste in your desired signature and adjust the position of the cursor as needed. Hit Enter. A new field will suddenly appear underneath your signature. Drag and resize it however you wish, keeping in mind the maximum file sizes allowed. Finally, type a description beneath your signature. That's it!
Remember to toggle off Show Image Preview afterwards. Otherwise, people might think you're trying to spam their inboxes with junk pictures.
Adding WiseStamp to Gmail is quite easy. All you have to do is visit the website, download the desktop client, and follow the prompts to complete setup. Once installed, you will see a green plus symbol beside your picture in the Compose window. Right click and select Quick Steps " Add Signature. Follow the wizard through and you'll be good to go.
From here, you can continue tweaking your signature as described previously, but most importantly, you can now drag and move objects around freely. Keep in mind that unlike many other services, WiseStamp does not offer templates. Instead, you are encouraged to experiment and play around with your designs. Although WiseStamp offers endless possibilities, sometimes the simplest solutions turn out to be the best. And if you feel stuck, don't worry. Our guides will teach you everything else you need to know.
We hope you enjoy this article. Please forward any comments or questions regarding the site, editors, or submitted material to tips@gizmodo.com. Happy writing!
 Send emails at scale

